- Made by AppCoda
- Contact us / Support
- Tweet this book
- Preface
- 1. Introduction to SwiftUI
- 2. Getting Started with SwiftUI and Working with Text
- 3. Working with Images
- 4. Layout User Interfaces with Stacks
- 5. Understanding ScrollView and Building a Carousel UI
- 6. Working with SwiftUI Buttons and Gradient
- 7. Understanding State and Binding
- 8. Implementing Path and Shape for Line Drawing and Pie Charts
- 9. Basic Animations and Transitions
- 10. Understanding Dynamic List, ForEach and Identifiable
- 11. Working with Navigation UI and Navigation Bar Customization
- 12. Playing with Modal Views, Floating Buttons and Alerts
- 13. Building a Form with Picker, Toggle and Stepper
- 14. Data Sharing with Combine and Environment Objects
- 15. Building a Registration Form with Combine and View Model
- 16. Working with Swipe-to-Delete, Context Menu and Action Sheets
- 17. Using Gestures
- 18. Displaying an Expandable Bottom Sheet Using Presentation Detents
- 19. Creating a Tinder-like UI with Gestures and Animations
- 20. Creating an Apple Wallet like Animation and View Transition
- 21. Working with JSON, Slider and Data Filtering
- 22. Building a ToDo app with Core Data
- 23. Integrating UIKit with SwiftUI Using UIViewRepresentable
- 24. Creating a Search Bar View and Working with Custom Binding
- 25. Putting Everything Together to Build a Real World App
- 26. Creating an App Store like Animated View Transition
- 27. Building an Image Carousel
- 28. Building an Expandable List View Using OutlineGroup
- 29. Building Grid Layout Using LazyVGrid and LazyHGrid
- 30. Creating an Animated Activity Ring with Shape and Animatable
- 31. Working with AnimatableModifier and LibraryContentProvider
- 32. Working with TextEditor to Create Multiline Text Fields
- 33. Using matchedGeometryEffect to Create View Animations
- 34. ScrollViewReader and Grid Animation
- 35. Working with Tab View and Tab Bar Customization
- 36. Using AsyncImage in SwiftUI for Loading Images Asynchronously
- 37. Implementing Search Bar Using Searchable
- 38. Creating Bar Charts and Line Charts with the Charts Framework
- 39. Capturing Text within Image Using Live Text APIs
- 40. How to Use ShareLink for Sharing Data Like Text and Photos
- 41. Using ImageRenderer to Convert SwiftUI Views into Images
- 42. Creating PDF Documents Using ImageRenderer
- 43. Using Gauge to Display Progress and Create a Speedometer
- 44. Creating Grid Layout Using Grid APIs
- 45. Switching Layout with AnyLayout
- Published with GitBook
Chapter 24
Creating a Search Bar View and Working with Custom Binding
Previously, we showed you how to implement a search bar by reusing the UISearchBar component of the old UIKit framework. Have you ever thought of building one from scratch? If you look at the search bar carefully, it's not too difficult to implement. So, let's try to build a SwiftUI version of a search bar in this chapter.
Not only will you learn how to create the search bar view, we will show you how to work with custom bindings. We've discussed bindings before, but haven't showed you how to create a custom binding. Custom binding is particularly useful when you need to insert additional program logic while it's being read and written. In addition to all that, you will learn how to dismiss the software keyboard in SwiftUI.
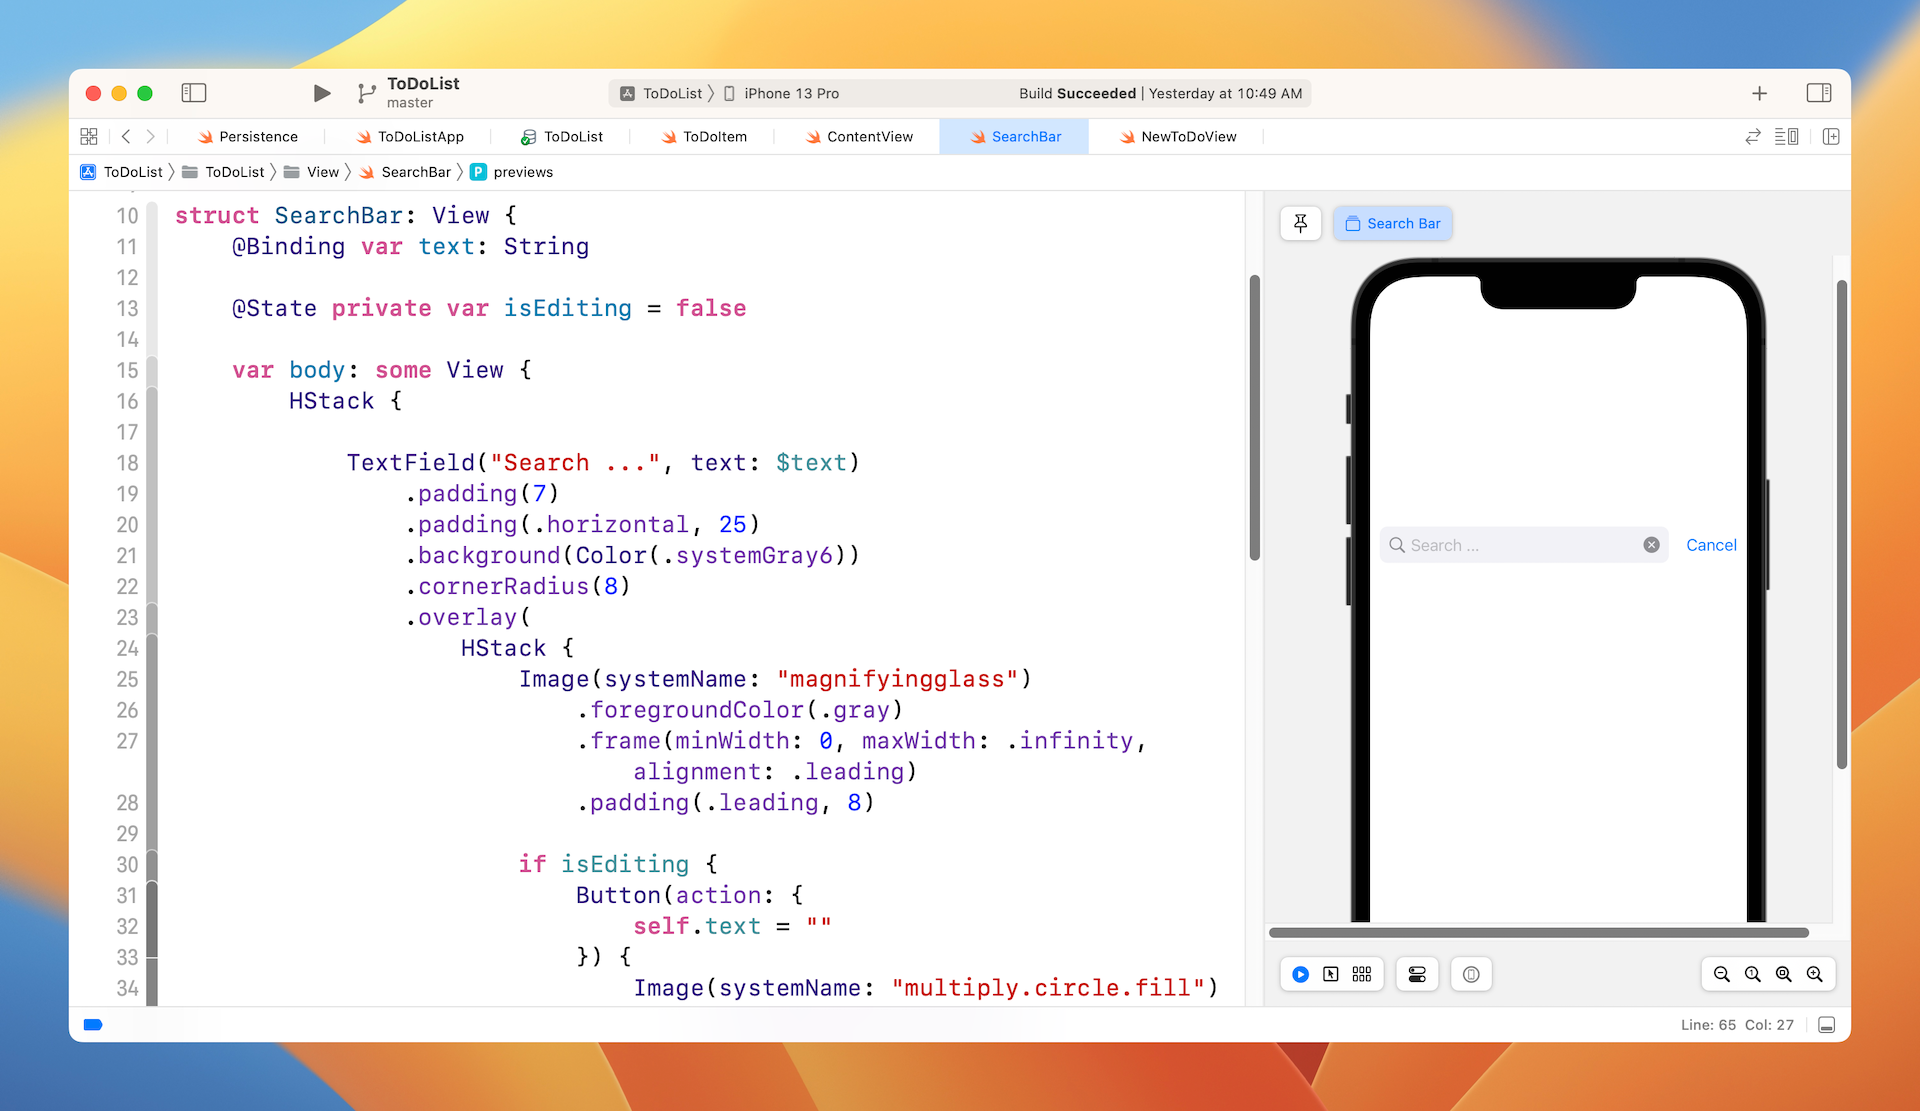
Figure 1 shows you the search bar we're going to build. The look & feel is the same as that of UISearchBar in UIKit. We will also implement the Cancel button which only appears when the user starts typing in the search field.

Implementing the Search Bar UI
We will convert the previous project from UISearchBar to our own implementation of search bar. To get started, please download the starter project from https://www.appcoda.com/resources/swiftui4/SwiftUIToDoListUISearchBar.zip. Once you download it, compile it to make sure it works. The app should show you a search bar, however, this bar is from UIKit. We are going to convert it to a search bar view built entirely using SwiftUI.
Open SearchBar.swift, which is the file we will focus on. We will rewrite the whole code but keep its struct name intact. We still call it SearchBar, which still accepts a binding of search text as an argument. To the caller (i.e. ContentView), there is nothing to change. The usage is still like this:
SearchBar(text: $searchText)
Now, let's begin with the UI implementation. If you want to challenge yourself, stop reading here and try to implement the search bar UI on your own. This UI is quite simple. It's composed of a text field, a couple of icons, and the cancel button.
If you have no idea how the UI is built, let's create it together. Replace the SearchBar struct in SearchBar.swift like this:
struct SearchBar: View {
    @Binding var text: String

    @State private var isEditing = false

    var body: some View {
        HStack {

            TextField("Search ...", text: $text)
                .padding(7)
                .padding(.horizontal, 25)
                .background(Color(.systemGray6))
                .cornerRadius(8)
                .overlay(
                    HStack {
                        Image(systemName: "magnifyingglass")
                            .foregroundColor(.gray)
                            .frame(minWidth: 0, maxWidth: .infinity, alignment: .leading)
                            .padding(.leading, 8)

                        if isEditing {
                            Button(action: {
                                self.text = ""
                            }) {
                                Image(systemName: "multiply.circle.fill")
                                    .foregroundColor(.gray)
                                    .padding(.trailing, 8)
                            }
                        }
                    }
                )
                .padding(.horizontal, 10)
                .onTapGesture {
                    withAnimation {
                        self.isEditing = true
                    }
                }


            if isEditing {
                Button(action: {
                    self.isEditing = false
                    self.text = ""

                }) {
                    Text("Cancel")
                }
                .padding(.trailing, 10)
                .transition(.move(edge: .trailing))
            }
        }
    }
}
First, we declare two variables: one is the binding of the search text and the other one is a variable for storing the state of the search field (editing or not).
We used a HStack to layout the text field and the Cancel button. For the text field, we overlay a magnifying glass icon and the cross icon (i.e. multiply.circle.fill), which is only displayed when the search field is in editing mode. The same goes for the Cancel button, which appears when the user taps the search field.
In order to preview the search bar, please also insert the following code:
struct SearchBar_Previews: PreviewProvider {
    static var previews: some View {
        SearchBar(text: .constant(""))
    }
}
Once you have added the code, you should be able to preview the search field. Click the play button to test the search field. When you select the text field, the Cancel button should appear.
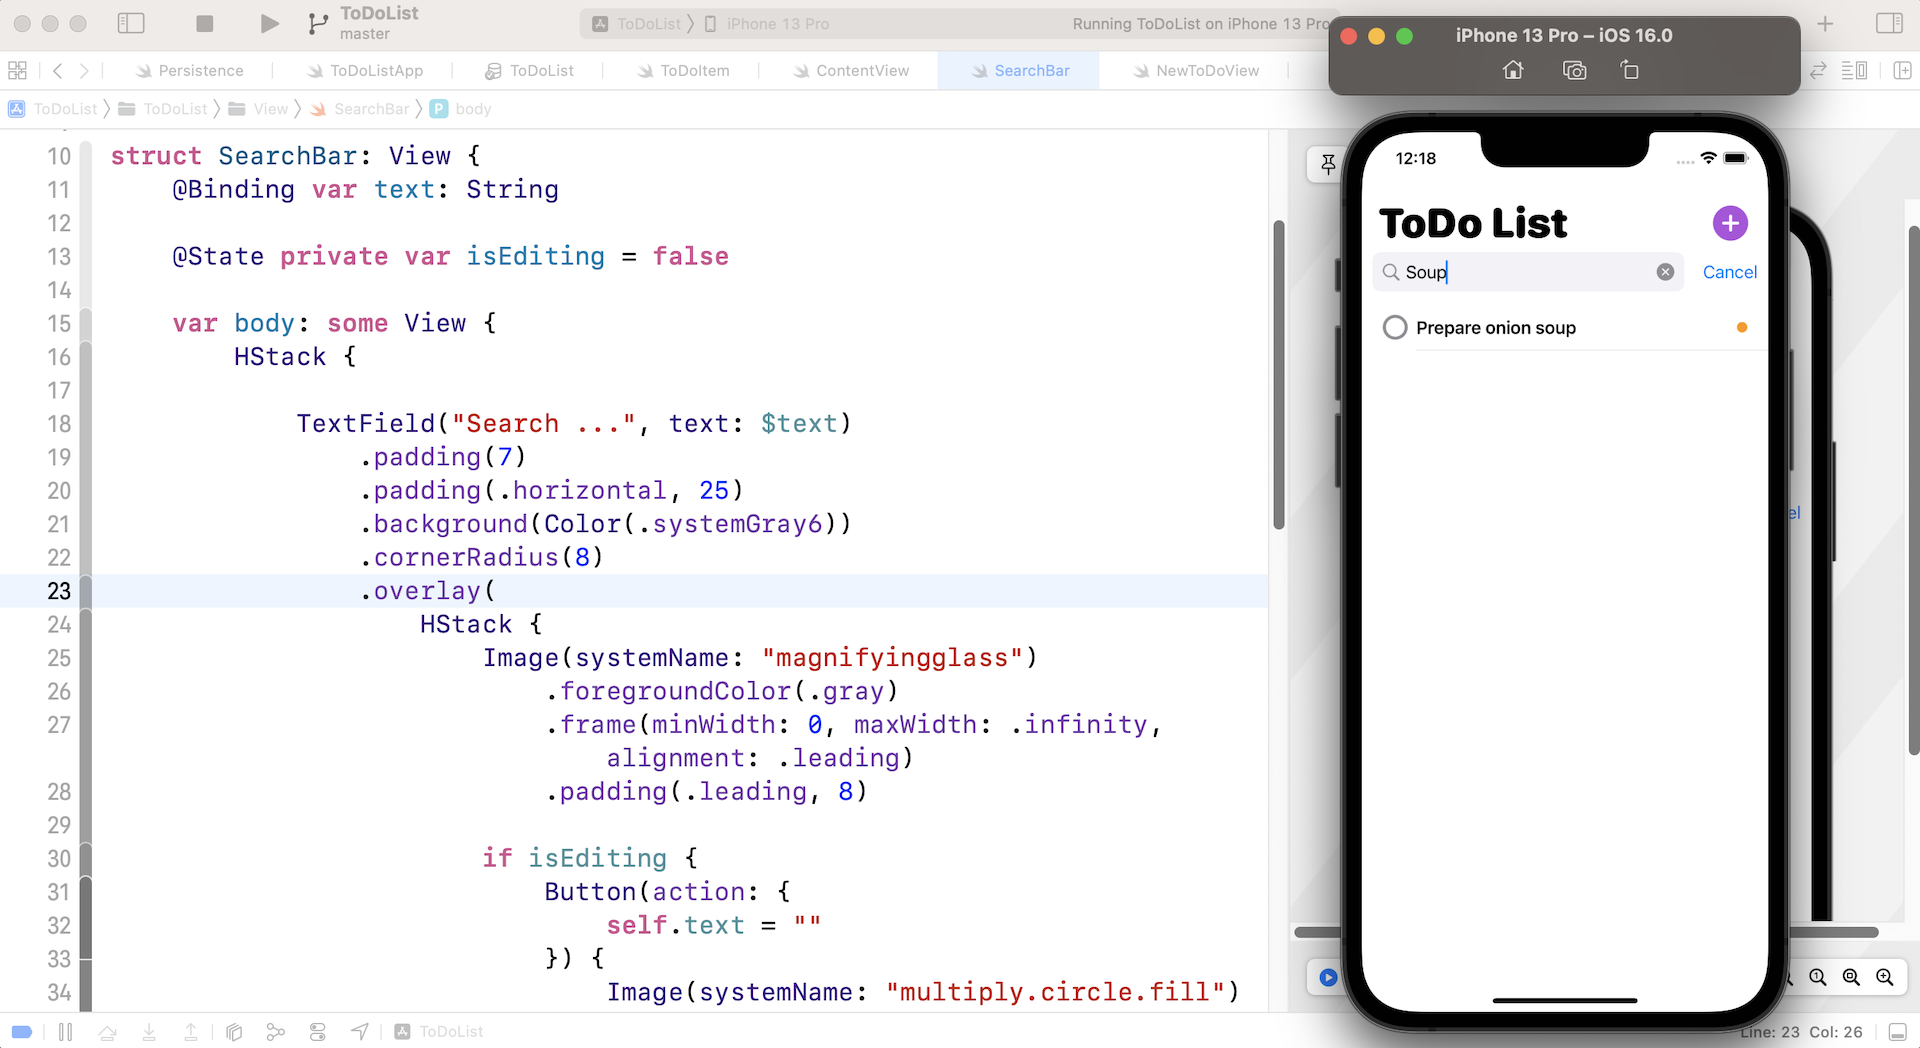
What's more is that the search bar already works! Run the app on a simulator and perform a search. It should filter the result based on the search term.
Dismissing the Keyboard
As you can see, it's not hard to create our own search bar entirely using SwiftUI. While the search bar is working, there is a minor issue we have to fix. Have you tried to tap the cancel button? It does clear the search field. However, the software keyboard is not dismissed.
To fix that, we need to add a line of code in the action block of the Cancel button in SearchBar.swift:
// Dismiss the keyboard
UIApplication.shared.sendAction(#selector(UIResponder.resignFirstResponder), to: nil, from: nil, for: nil)
In the code, we call the sendAction method to resign the first responder and dismiss the keyboard. You can now run the app using a simulator. When you tap the cancel button, it should clear the search field and dismiss the software keyboard.
Working with Custom Binding
The SwiftUI version of search bar already functions properly, but I want to take this opportunity to discuss custom binding with you. In SearchBar.swift, we declare a binding of the search text like this:
@Binding var text: String
It works great for our current implementation. But let me ask you. What if we needed to add extra logic when reading or writing this binding? For example, how can you capitalize each word in the search field?
Swift has a built-in feature to capitalize a string. You can use the capitalized property of the text and retrieve the capitalized text. The question is how do we update the binding of text?
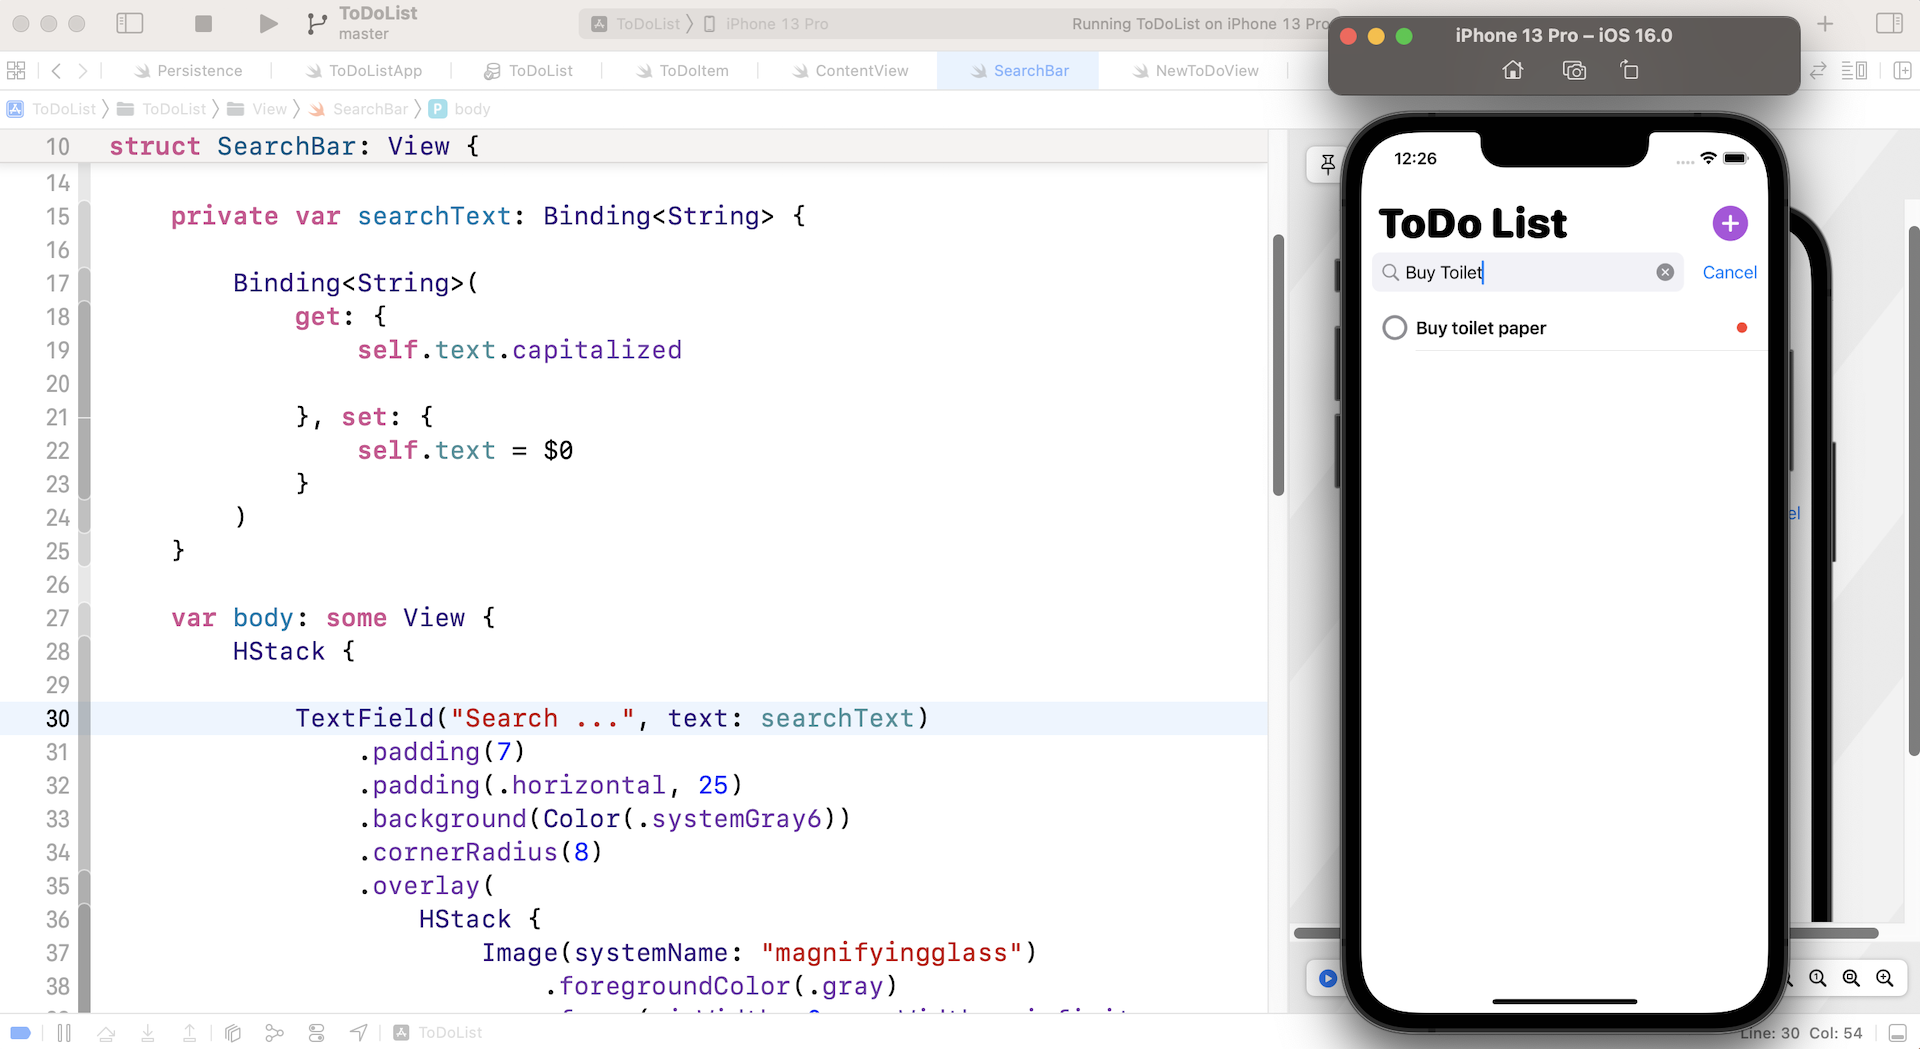
In this case, you will need to create a custom binding in SearchBar.swift like this:
private var searchText: Binding<String> {

    return Binding<String>(
        get: {
            self.text.capitalized

        }, set: {
            self.text = $0
        }
    )
}
In the code above, we create a custom binding named searchText with closures that read (get) and write (set) the binding value. For the get part, we customize the binding value of text by accessing the capitalized property. This is how we capitalize each word the user types in the search field. For the set part, we do not make any changes and set it to the original value. However, if you need to add extra logic when setting the binding, you can modify the code in set.
As a side note, you can omit the return keyword and write the binding like this:
private var searchText: Binding<String> {

    Binding<String>(
        get: {
            self.text.capitalized

        }, set: {
            self.text = $0
        }
    )
}
This is a great feature introduced since Swift 5.1, in case you are not aware.
We are still passing the text binding to TextField. Before the custom binding change takes effect, we will need to make one more change. Modify the parameter in TextField and make sure you pass the searchText as the binding:
TextField("Search ...", text: searchText)
Now run the app on a simulator. Type a few words into the search field. The app should automatically capitalize each word as you type.
Summary
In this chapter, we showed you another approach to implementing a search bar. As you can see, it's not difficult to build one entirely using SwiftUI. You've also learned how to create a custom binding. This is very useful when you need to add extra program logic when setting or retrieving the binding value.
For reference, you can download the complete search bar project here: