- Made by AppCoda
- Contact us / Support
- Tweet this book
- Preface
- 1. Introduction to SwiftUI
- 2. Getting Started with SwiftUI and Working with Text
- 3. Working with Images
- 4. Layout User Interfaces with Stacks
- 5. Understanding ScrollView and Building a Carousel UI
- 6. Working with SwiftUI Buttons and Gradient
- 7. Understanding State and Binding
- 8. Implementing Path and Shape for Line Drawing and Pie Charts
- 9. Basic Animations and Transitions
- 10. Understanding Dynamic List, ForEach and Identifiable
- 11. Working with Navigation UI and Navigation Bar Customization
- 12. Playing with Modal Views, Floating Buttons and Alerts
- 13. Building a Form with Picker, Toggle and Stepper
- 14. Data Sharing with Combine and Environment Objects
- 15. Building a Registration Form with Combine and View Model
- 16. Working with Swipe-to-Delete, Context Menu and Action Sheets
- 17. Using Gestures
- 18. Displaying an Expandable Bottom Sheet Using Presentation Detents
- 19. Creating a Tinder-like UI with Gestures and Animations
- 20. Creating an Apple Wallet like Animation and View Transition
- 21. Working with JSON, Slider and Data Filtering
- 22. Building a ToDo app with Core Data
- 23. Integrating UIKit with SwiftUI Using UIViewRepresentable
- 24. Creating a Search Bar View and Working with Custom Binding
- 25. Putting Everything Together to Build a Real World App
- 26. Creating an App Store like Animated View Transition
- 27. Building an Image Carousel
- 28. Building an Expandable List View Using OutlineGroup
- 29. Building Grid Layout Using LazyVGrid and LazyHGrid
- 30. Creating an Animated Activity Ring with Shape and Animatable
- 31. Working with AnimatableModifier and LibraryContentProvider
- 32. Working with TextEditor to Create Multiline Text Fields
- 33. Using matchedGeometryEffect to Create View Animations
- 34. ScrollViewReader and Grid Animation
- 35. Working with Tab View and Tab Bar Customization
- 36. Using AsyncImage in SwiftUI for Loading Images Asynchronously
- 37. Implementing Search Bar Using Searchable
- 38. Creating Bar Charts and Line Charts with the Charts Framework
- 39. Capturing Text within Image Using Live Text APIs
- 40. How to Use ShareLink for Sharing Data Like Text and Photos
- 41. Using ImageRenderer to Convert SwiftUI Views into Images
- 42. Creating PDF Documents Using ImageRenderer
- 43. Using Gauge to Display Progress and Create a Speedometer
- 44. Creating Grid Layout Using Grid APIs
- 45. Switching Layout with AnyLayout
- Published with GitBook
Chapter 34
ScrollViewReader and Grid Animation
Earlier, I introduced you to the new matchedGeometryEffect modifier and showed you how to create some basic view animations. In this chapter, let's see how to use the modifier and animate item selection in a grid view. Additionally, you will learn another brand new UI component called ScrollViewReader.
The Demo App
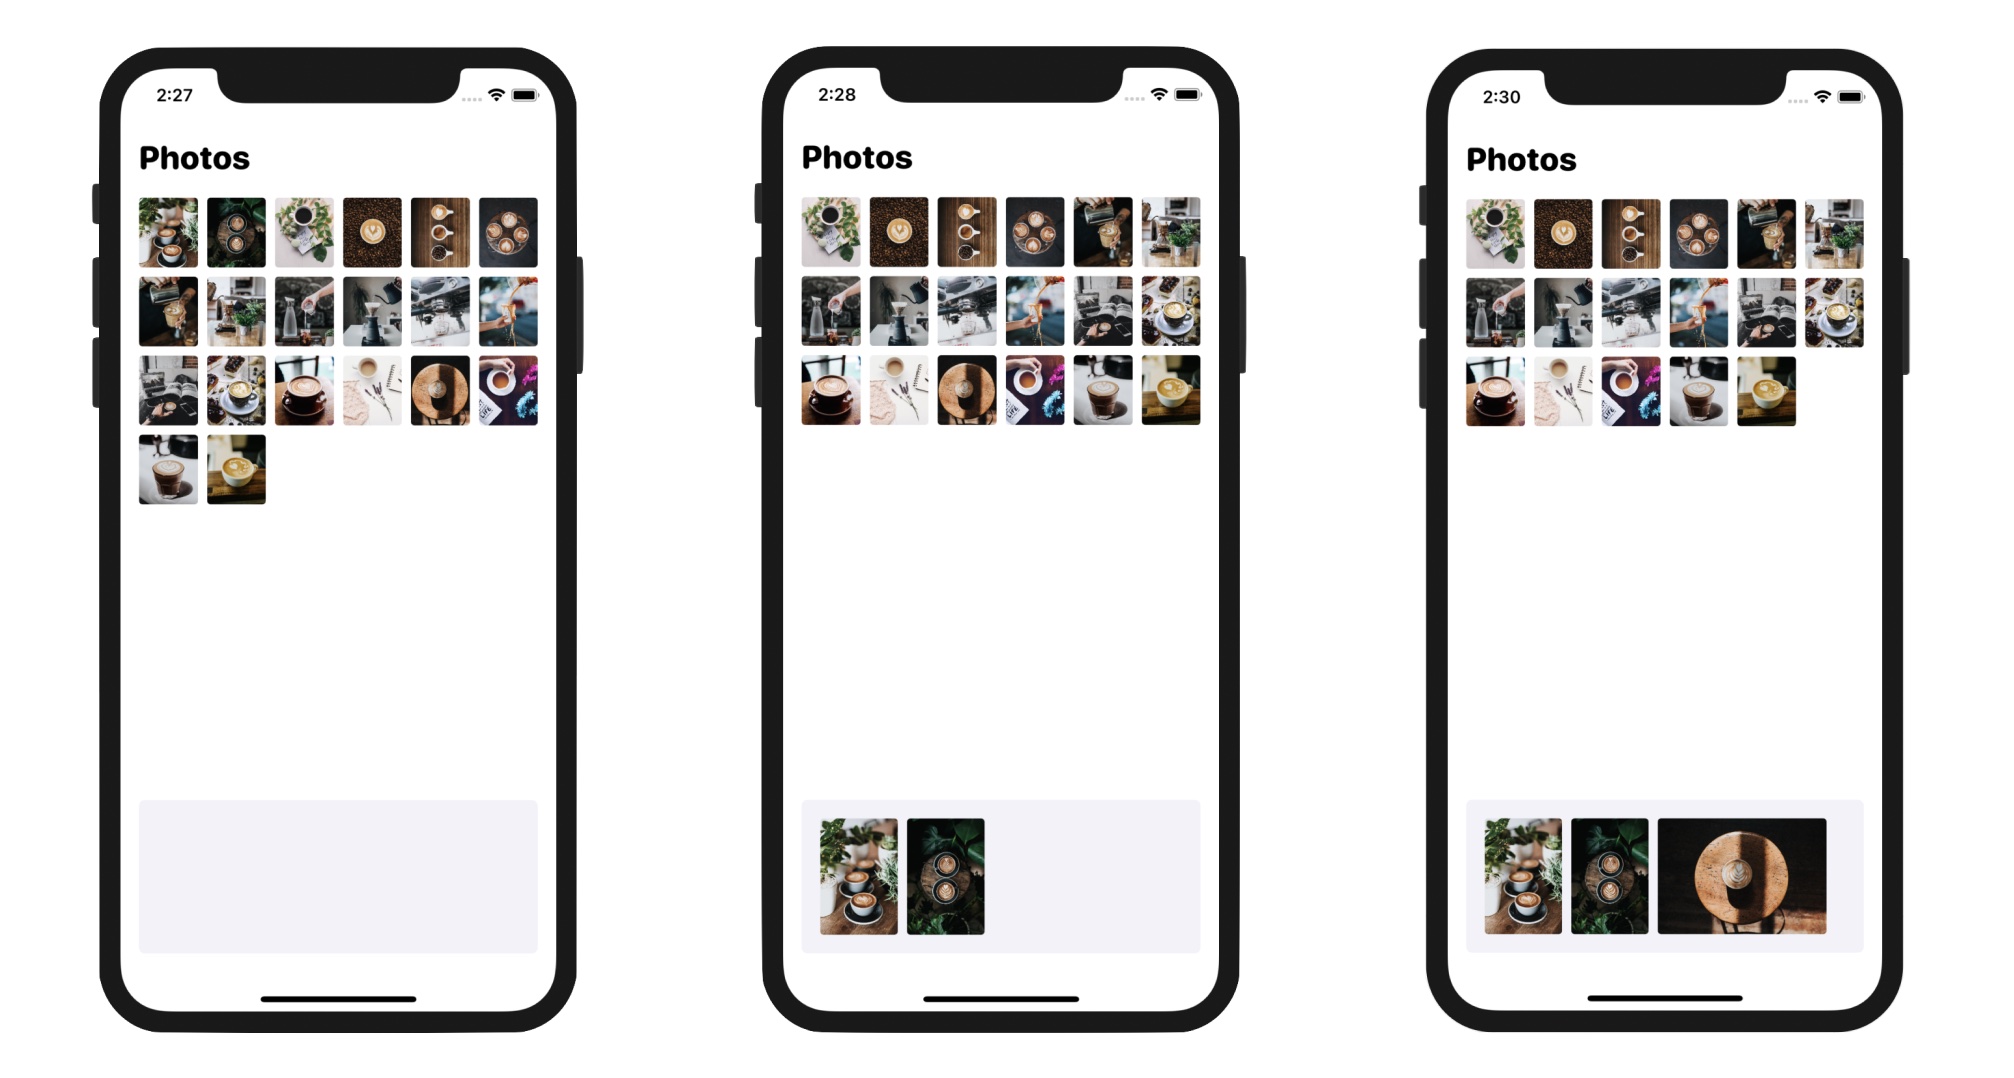
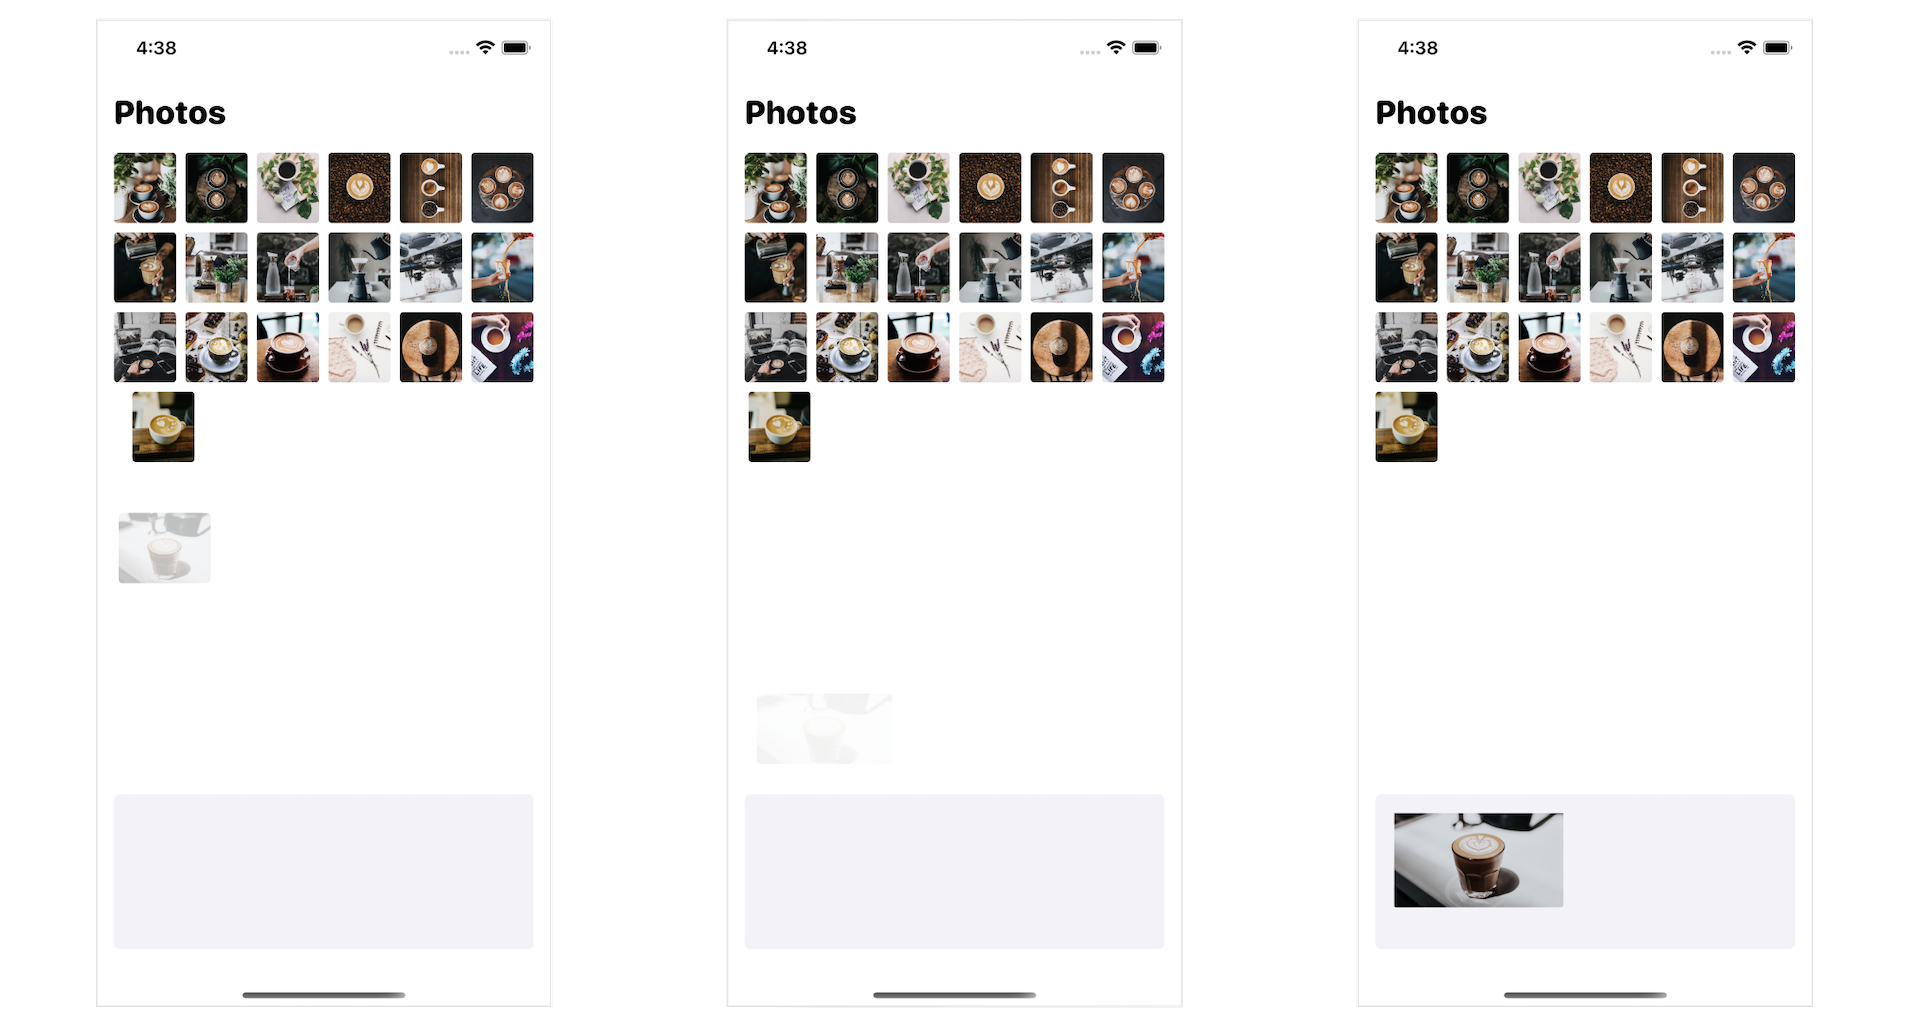
Before we step into the implementation, let me show you the final deliverable. This should give you an idea of what you are going to build. When developing real world apps, you may need to display a grid of photo items and let users select some of the items.
One way of presenting the item selection is to have a dock at the bottom of the screen. When an item is selected, it is removed from the grid and inserted into the dock. As you select more items, the dock will hold more items. You can swipe horizontally to navigate through the items in the dock. If you tap an item in the dock, that item will be removed and inserted back into the grid. Figure 1 illustrates how the insertion and removal of an item works.
We will implement the grid view and the item selection. We will use the matchedGeometryEffect modifier to animate the selection. To get started, please first download the starter project at https://www.appcoda.com/resources/swiftui4/SwiftUIGridViewAnimationStarter.zip. This project includes sample data and images.
Building the Photo Grid
First, let's create the photo grid. In the ContentView struct, declare a state variable like this:
@State private var photoSet = samplePhotos
The samplePhotos constant is predefined in the starter project and stores the array of photos. The reason why photoSet is declared as a state variable is that we will change its content for photo selection.
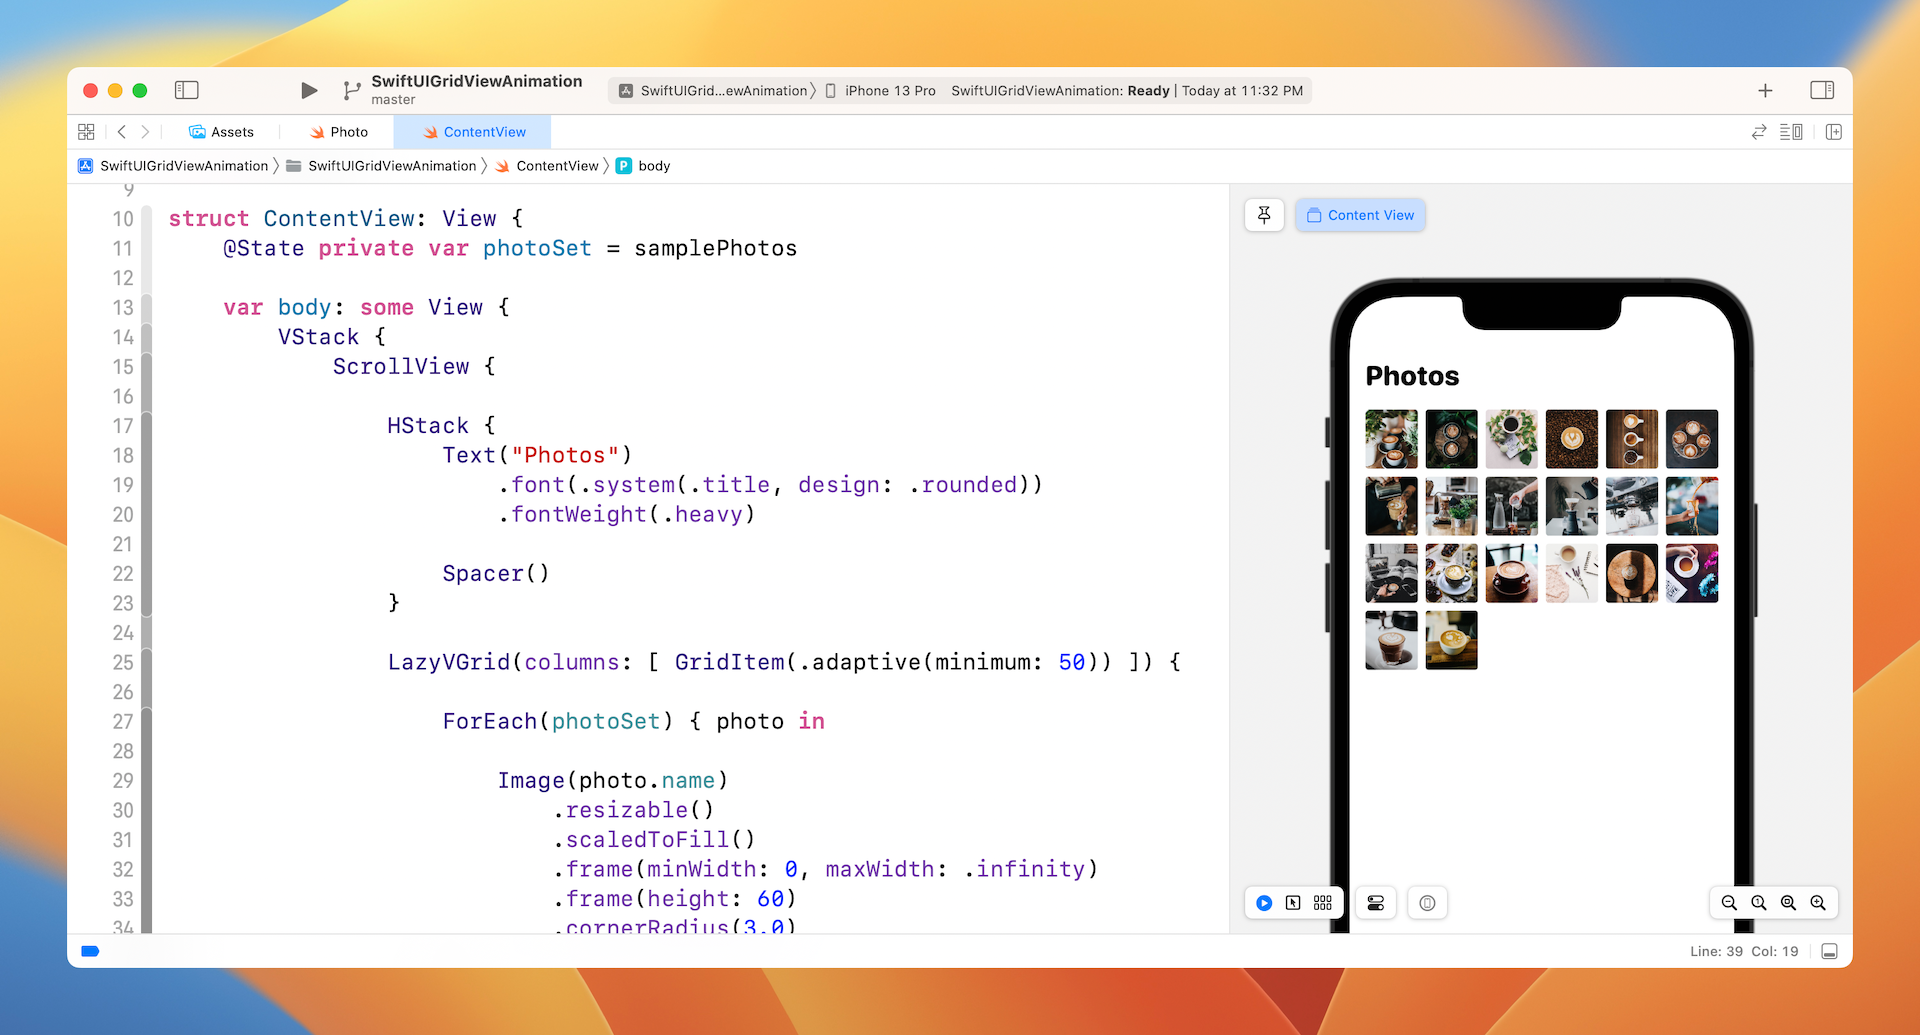
To present the photos in a grid, we use the built-in LazyVGrid component. Insert the following code in body:
VStack {
    ScrollView {

        HStack {
            Text("Photos")
                .font(.system(.title, design: .rounded))
                .fontWeight(.heavy)

            Spacer()
        }

        LazyVGrid(columns: [ GridItem(.adaptive(minimum: 50)) ]) {

            ForEach(photoSet) { photo in

                Image(photo.name)
                    .resizable()
                    .scaledToFill()
                    .frame(minWidth: 0, maxWidth: .infinity)
                    .frame(height: 60)
                    .cornerRadius(3.0)
            }
        }
    }
}
.padding()
Assuming you have read the earlier chapter about grid view, the code is self explanatory. We simply use the adaptive layout to arrange the set of photos in a grid.
Adding the Dock
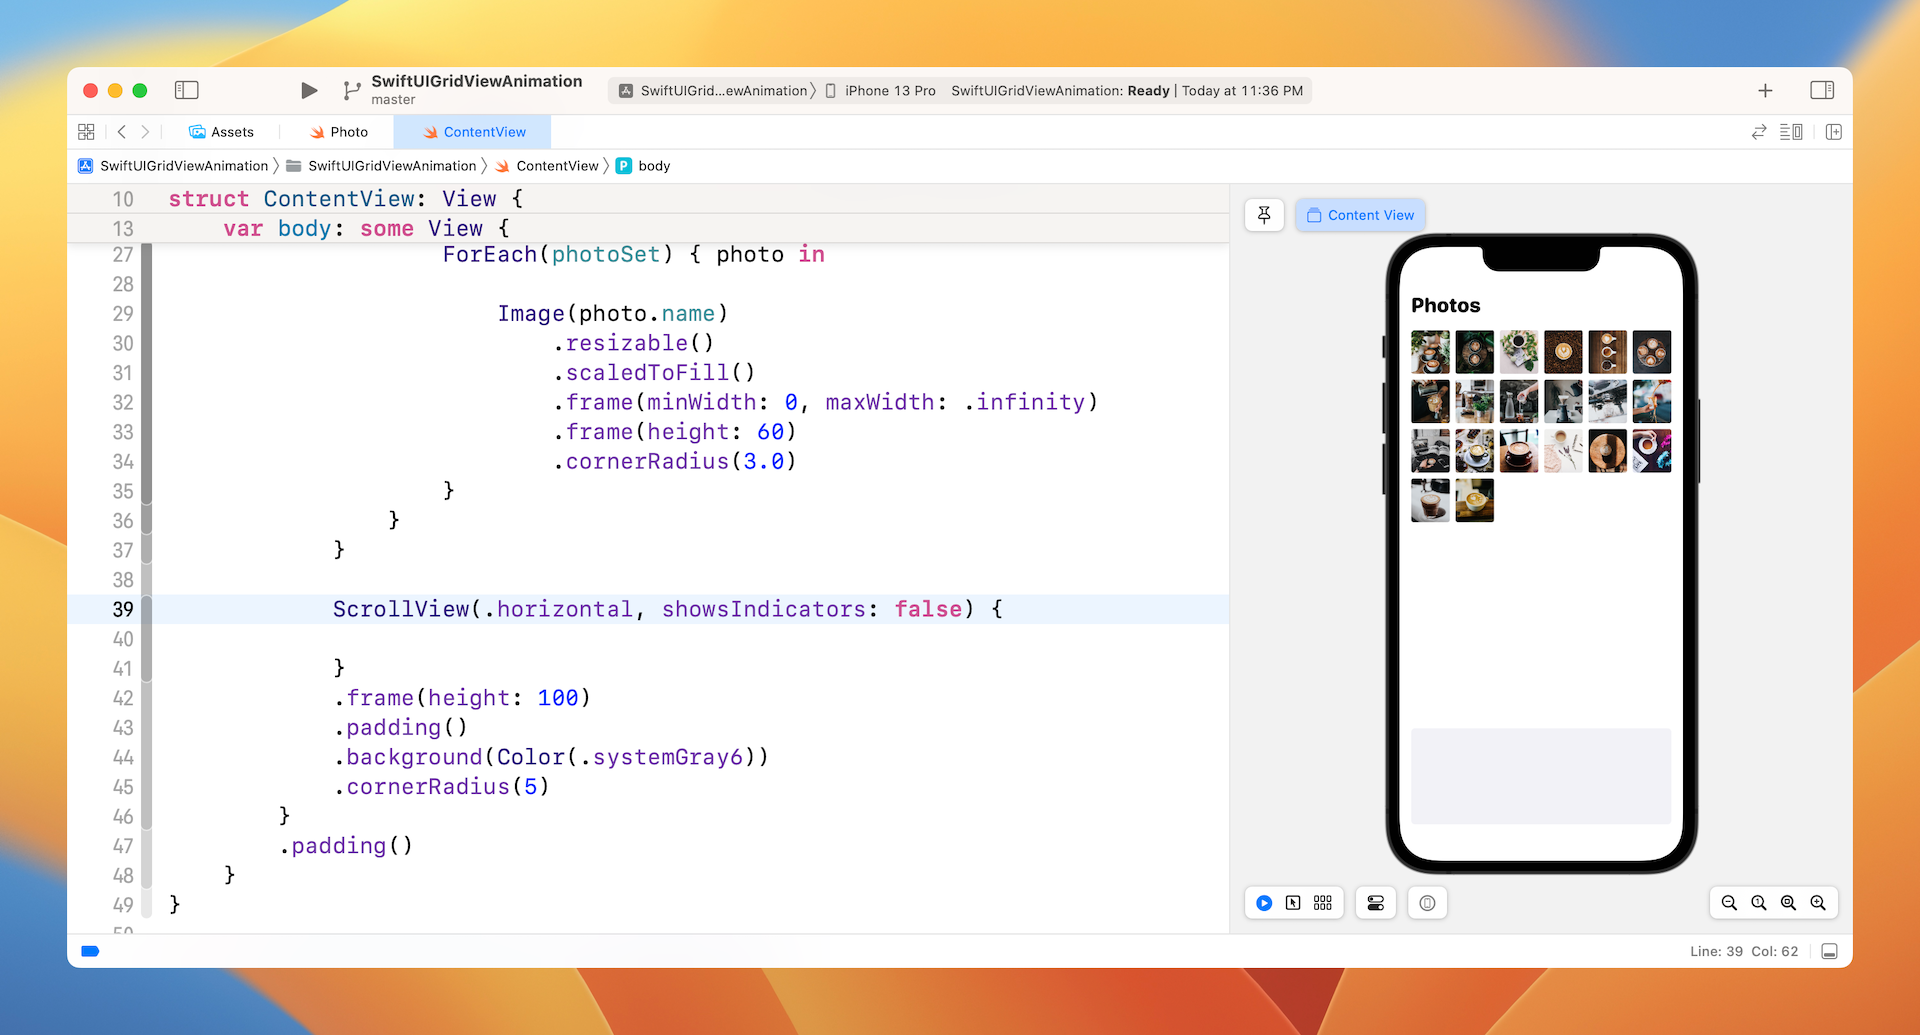
For photo selection, we will create a dock to hold the selected photos. Insert the following code inside the VStack:
ScrollView(.horizontal, showsIndicators: false) {

}
.frame(height: 100)
.padding()
.background(Color(.systemGray6))
.cornerRadius(5)
This creates a scrollable rectangle area for holding the selected photos. Right now, it's just blank.
Handling Photo Selection
When a photo is selected, we will remove it from the photo grid and insert it into the dock. To handle photo selection, we will create a state variable to hold the selected photos. Insert the following code in ContentView to declare the variable:
@State private var selectedPhotos: [Photo] = []
Each photo in the photoSet has its own ID of the type UUID. To store the current selected photo, declare another state variable of the type UUID:
@State private var selectedPhotoId: UUID?
To handle the photo selection, attach a onTapGesture function to the Image component of LazyVGrid like this:
Image(photo.name)
    .resizable()
    .scaledToFill()
    .frame(minWidth: 0, maxWidth: .infinity)
    .frame(height: 60)
    .cornerRadius(3.0)
    .onTapGesture {
        selectedPhotos.append(photo)
        selectedPhotoId = photo.id
        if let index = photoSet.firstIndex(where: { $0.id == photo.id }) {
            photoSet.remove(at: index)
        }
    }
In the block onTapGesture, we add the selected photo to the selectedPhotos array and update the selectedPhotoId. Additionally, we remove the selected photo from photoSet. Since photoSet is a state variable, the selected photo will be removed from the grid once it's removed from the array.
The selected photo should be added to the dock. So, update the empty ScrollView of the dock like this:
ScrollView(.horizontal, showsIndicators: false) {
    LazyHGrid(rows: [ GridItem() ]) {
        ForEach(selectedPhotos) { photo in
            Image(photo.name)
                .resizable()
                .scaledToFill()
                .frame(minWidth: 0, maxWidth: .infinity)
                .frame(height: 100)
                .cornerRadius(3.0)
                .onTapGesture {
                    photoSet.append(photo)
                    if let index = selectedPhotos.firstIndex(where: { $0.id == photo.id }) {
                        selectedPhotos.remove(at: index)
                    }
                }
        }
    }
}
We create a horizontal grid to present the selected photos. For each photo, we attach the onTapGesture function to it. When someone taps a photo in the dock, it will be added back to the photo grid and removed from selectedPhotos. In other words, the photo will be deleted from the dock.
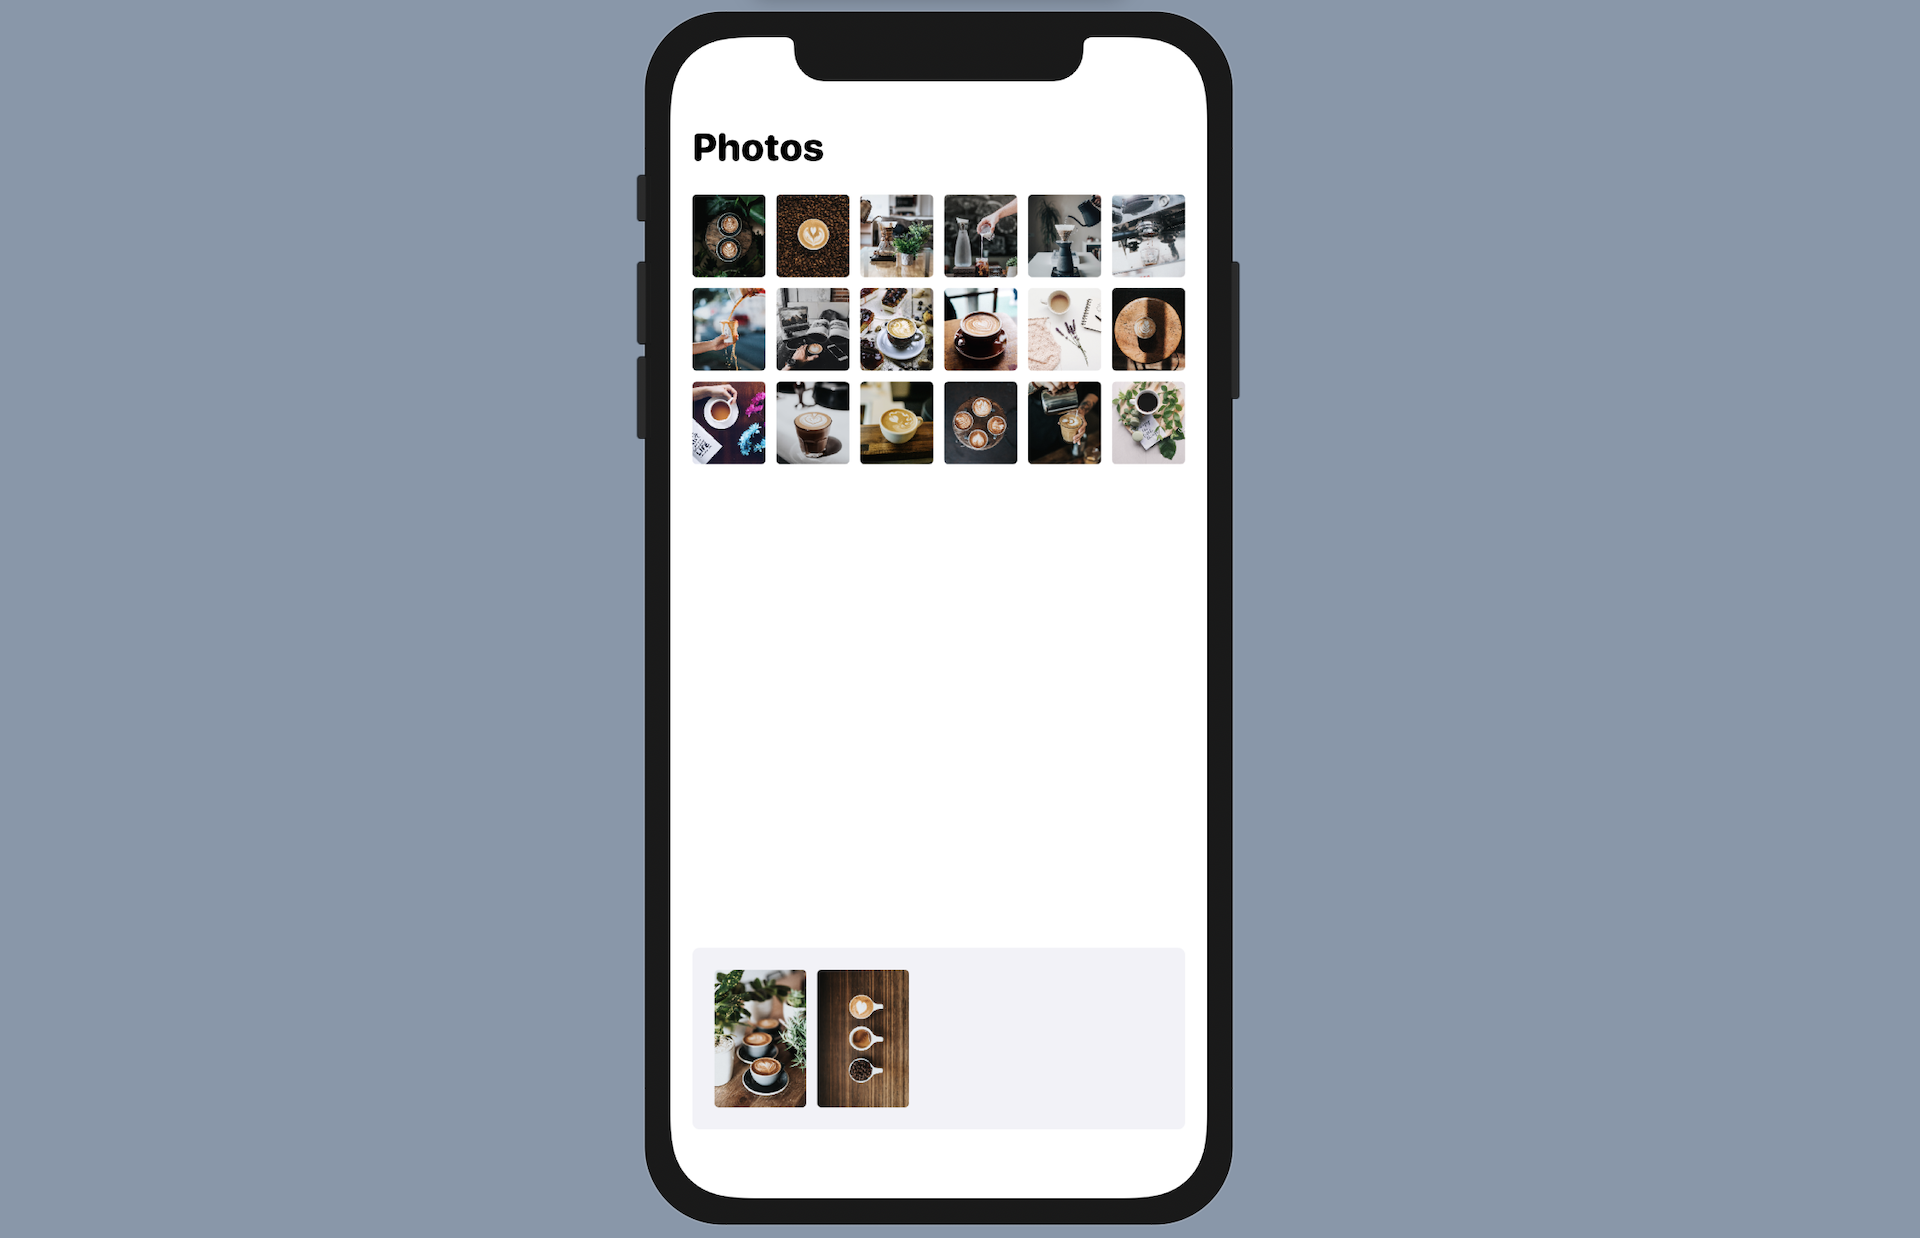
If you test the app in the preview canvas, you should be able to select any of the photos in the grid. When you tap a photo, it will be automatically added to the dock and that photo will be removed from the grid. Conversely, you can tap a photo in the dock to move it back to the photo grid.
Using MatchedGeometryEffect to Animate the Transition
The photo selection works pretty well but we can make it even better by animating the transition of the photo selection. Currently, the selected photo immediately appears in the dock. What I want to do is to animate the transition of the photo selection. Once selected, the photo should look like it flies from the photo grid to the dock.
With the matchedGeometryEffect modifier, it is very easy to implement this type of animation. First, declare the namespace variable for this transition in ContentView:
@Namespace private var photoTransition
Next, attach the .matchedGeometryEffect modifier to both Image objects:
.matchedGeometryEffect(id: photo.id, in: photoTransition)
The trick here is to assign each image a distinct ID, so that the app will only animate the change of the selected photo.
To enable the animation, attach the .animation modifier to the VStack and insert the following line of code under .padding():
.animation(.interactiveSpring(), value: selectedPhotoId)
This is the code you need to create the animated transtion. Run the app on a simulator or in the preview canvas. When you tap a photo in the grid, you can see a beautiful transition before it's added to the dock.
Using ScrollViewReader to Move a Scroll View
The animated transition works great. But did you notice a bug in the app? The dock doesn't scroll automatically to display the most recent selected photo. If you select more than 4 photos, you will need to manually scroll the dock to reveal other selected photos.
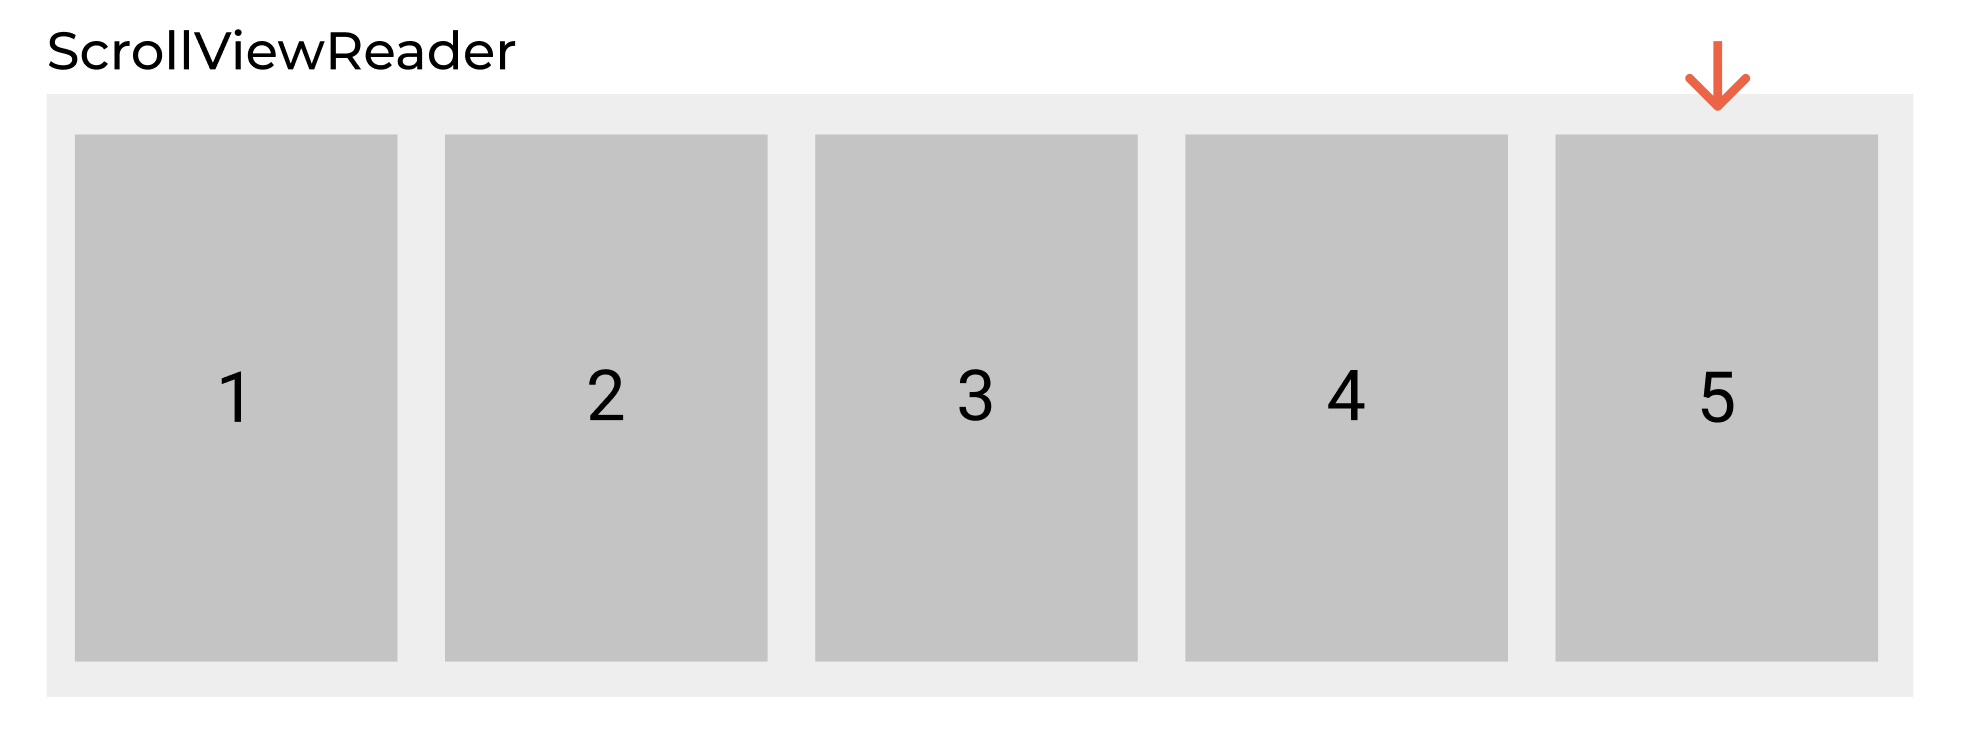
How can we fix this bug? In iOS 14, Apple introduced a component called ScrollViewReader. As its name suggests, this reader is designed to work with ScrollView. It allows developers to programmatically move a scroll view to a specific location. To use ScrollViewReader, you wrap it around a ScrollView. Each of the child views should be given their own identifier. You can then call the scrollTo function of the ScrollViewProxy with the specific ID to move the scroll view to that particular location.
Now let's get back to our demo app. To programmatically scroll the ScrollView of the dock, we need to first give each photo an identifier. The scrollTo function requires us to provide an identifier of the view to scroll to. Since each photo already has its unique identifier, we can use the photo ID as the view's identifier.
To set the identifier of the Image views in the dock, attach the .id modifier to it:
.id(photo.id)
Once we assign each Image view an identifier, wrap the horizontal ScrollView in a ScrollViewReader like this:
ScrollViewReader { scrollProxy in
    ScrollView(.horizontal, showsIndicators: false) {
        LazyHGrid(rows: [ GridItem() ]) {
            ForEach(selectedPhotos) { photo in
                Image(photo.name)
                    .resizable()
                    .scaledToFill()
                    .frame(minWidth: 0, maxWidth: .infinity)
                    .frame(height: 100)
                    .cornerRadius(3.0)
                    .id(photo.id)
                    .matchedGeometryEffect(id: photo.id, in: photoTransition)
                    .onTapGesture {
                        photoSet.append(photo)
                        if let index = selectedPhotos.firstIndex(where: { $0.id == photo.id }) {
                            selectedPhotos.remove(at: index)
                        }
                    }
            }
        }
    }
    .frame(height: 100)
    .padding()
    .background(Color(.systemGray6))
    .cornerRadius(5)
}
Finally, attach the .onChange function to the ScrollView of the dock like this:
.onChange(of: selectedPhotoId, perform: { id in
    guard id != nil else { return }

    scrollProxy.scrollTo(id)
})
We use .onChange to listen for the update of the selectedPhotoId. Whenever the selected photo ID is changed, we call scrollTo with that photo ID to scroll the scroll view to that particular location. This ensures the dock always shows the most recent selected photo. You can run the app again to try it out.

Summary
In this chapter, we continue to explore the usage of matchedGeometryEffect and use this modifier to create an amazing view transition. The modifier opens up a lot of opportunities for developers to improve the user experience of their iOS apps. We also experimented with the new ScrollViewReader to see how to use it to scroll a scroll view programatically.
For reference, you can download the complete project here: