- Made by AppCoda
- Contact us / Support
- Tweet this book
- Preface
- 1. Introduction to SwiftUI
- 2. Getting Started with SwiftUI and Working with Text
- 3. Working with Images
- 4. Layout User Interfaces with Stacks
- 5. Understanding ScrollView and Building a Carousel UI
- 6. Working with SwiftUI Buttons and Gradient
- 7. Understanding State and Binding
- 8. Implementing Path and Shape for Line Drawing and Pie Charts
- 9. Basic Animations and Transitions
- 10. Understanding Dynamic List, ForEach and Identifiable
- 11. Working with Navigation UI and Navigation Bar Customization
- 12. Playing with Modal Views, Floating Buttons and Alerts
- 13. Building a Form with Picker, Toggle and Stepper
- 14. Data Sharing with Combine and Environment Objects
- 15. Building a Registration Form with Combine and View Model
- 16. Working with Swipe-to-Delete, Context Menu and Action Sheets
- 17. Using Gestures
- 18. Displaying an Expandable Bottom Sheet Using Presentation Detents
- 19. Creating a Tinder-like UI with Gestures and Animations
- 20. Creating an Apple Wallet like Animation and View Transition
- 21. Working with JSON, Slider and Data Filtering
- 22. Building a ToDo app with Core Data
- 23. Integrating UIKit with SwiftUI Using UIViewRepresentable
- 24. Creating a Search Bar View and Working with Custom Binding
- 25. Putting Everything Together to Build a Real World App
- 26. Creating an App Store like Animated View Transition
- 27. Building an Image Carousel
- 28. Building an Expandable List View Using OutlineGroup
- 29. Building Grid Layout Using LazyVGrid and LazyHGrid
- 30. Creating an Animated Activity Ring with Shape and Animatable
- 31. Working with AnimatableModifier and LibraryContentProvider
- 32. Working with TextEditor to Create Multiline Text Fields
- 33. Using matchedGeometryEffect to Create View Animations
- 34. ScrollViewReader and Grid Animation
- 35. Working with Tab View and Tab Bar Customization
- 36. Using AsyncImage in SwiftUI for Loading Images Asynchronously
- 37. Implementing Search Bar Using Searchable
- 38. Creating Bar Charts and Line Charts with the Charts Framework
- 39. Capturing Text within Image Using Live Text APIs
- 40. How to Use ShareLink for Sharing Data Like Text and Photos
- 41. Using ImageRenderer to Convert SwiftUI Views into Images
- 42. Creating PDF Documents Using ImageRenderer
- 43. Using Gauge to Display Progress and Create a Speedometer
- 44. Creating Grid Layout Using Grid APIs
- 45. Switching Layout with AnyLayout
- Published with GitBook
Chapter 45
Switching Layout with AnyLayout
Starting from iOS 16, SwiftUI provides AnyLayout and the Layout protocol for developers to create customized and complex layouts. AnyLayout is a type-erased instance of the layout protocol. You can use AnyLayout to create a dynamic layout that responds to users’ interactions or environment changes.
In this chapter, you will learn how to use AnyLayout to switch between vertical and horizontal layout.
Using AnyLayout
Let's first create a new Xcode project using the App template. Name the project SwiftUIAnyLayout or whatever name you prefer. What we are going to build is a simple demo app that switches the UI layout when you tap the stack view. Figure 1 shows the UI layout for different orientations.
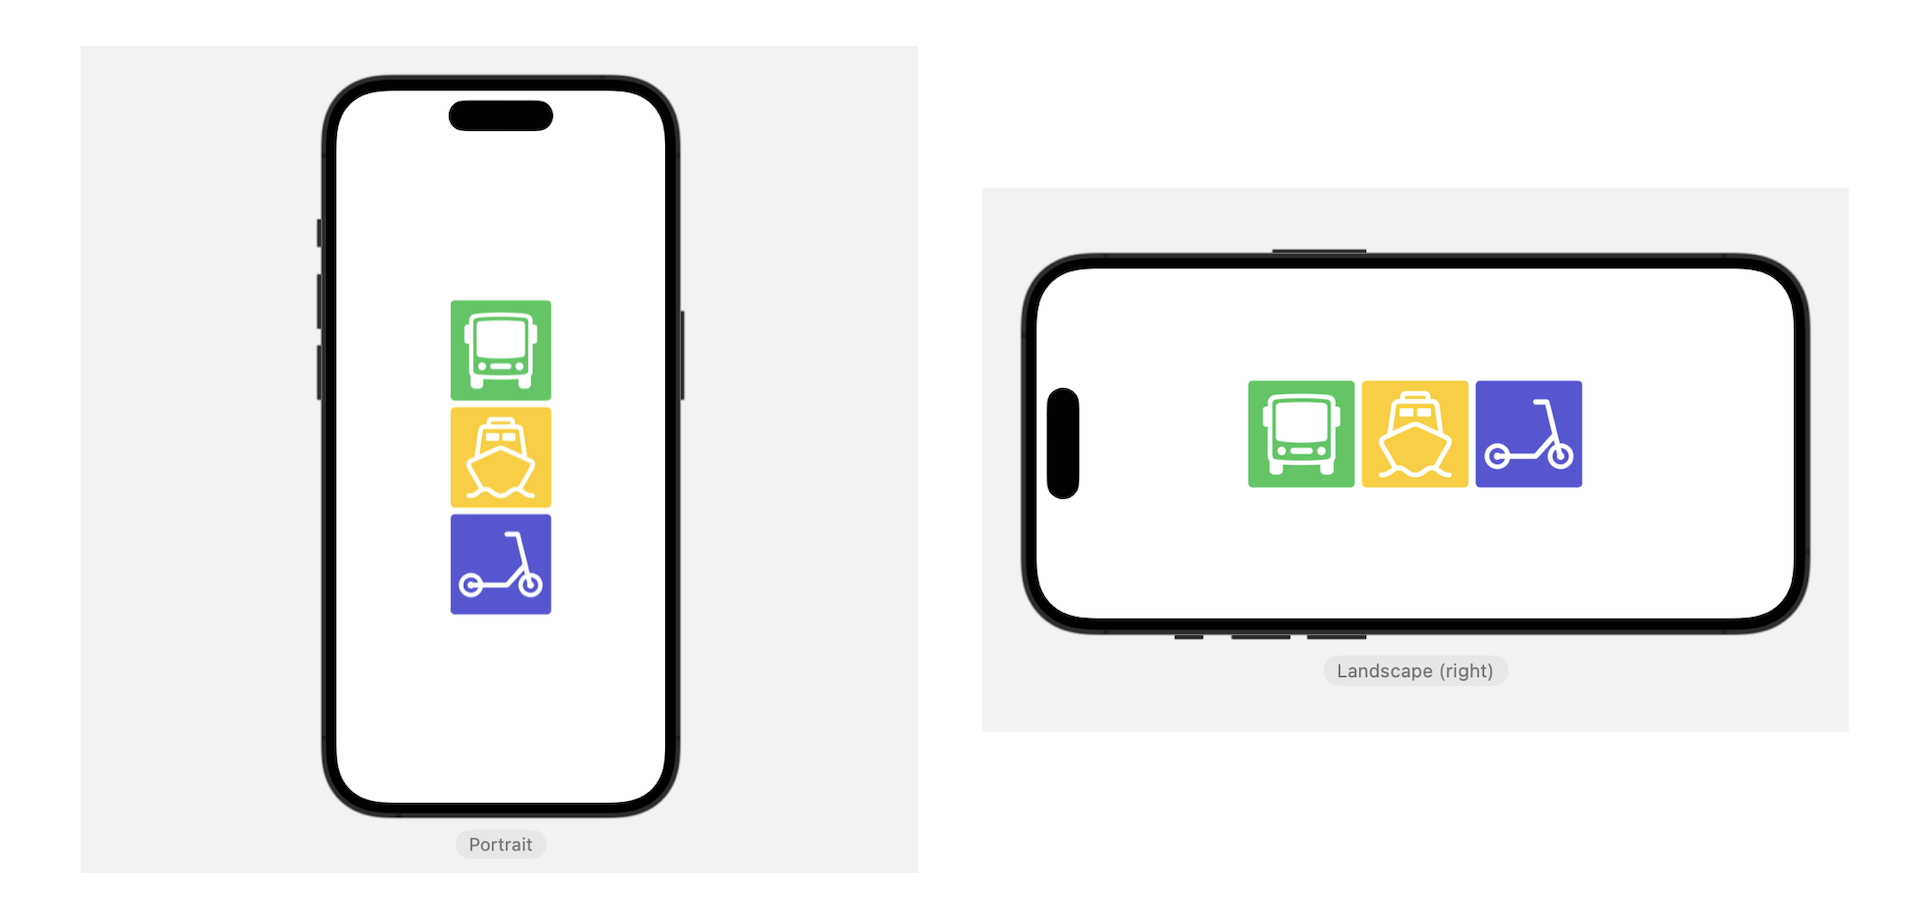
The app initially arranges three images vertically using VStack. When a user taps the stack view, it changes to a horizontal stack. With AnyLayout, you can implement the layout like this:
struct ContentView: View {
    @State private var changeLayout = false

    var body: some View {
        let layout = changeLayout ? AnyLayout(HStackLayout()) : AnyLayout(VStackLayout())

        layout {
            Image(systemName: "bus")
                .font(.system(size: 80))
                .frame(width: 120, height: 120)
                .background(in: RoundedRectangle(cornerRadius: 5.0))
                .backgroundStyle(.green)
                .foregroundColor(.white)


            Image(systemName: "ferry")
                .font(.system(size: 80))
                .frame(width: 120, height: 120)
                .background(in: RoundedRectangle(cornerRadius: 5.0))
                .backgroundStyle(.yellow)
                .foregroundColor(.white)

            Image(systemName: "scooter")
                .font(.system(size: 80))
                .frame(width: 120, height: 120)
                .background(in: RoundedRectangle(cornerRadius: 5.0))
                .backgroundStyle(.indigo)
                .foregroundColor(.white)

        }
        .animation(.default, value: changeLayout)
        .onTapGesture {
            changeLayout.toggle()
        }
    }
}
We define a layout variable to hold an instance of AnyLayout. Depending on the value of changeLayout, this layout changes between horizontal and vertical layouts. The HStackLayout (or VStackLayout) behaves like a HStack (or VStack) but conforms to the Layout protocol so you can use it in the conditional layouts.
By attaching the animation to the layout, the layout change can be animated. Now when you tap the stack view, it switches between vertical and horizontal layouts.
Switching Layouts based on the device's orientation
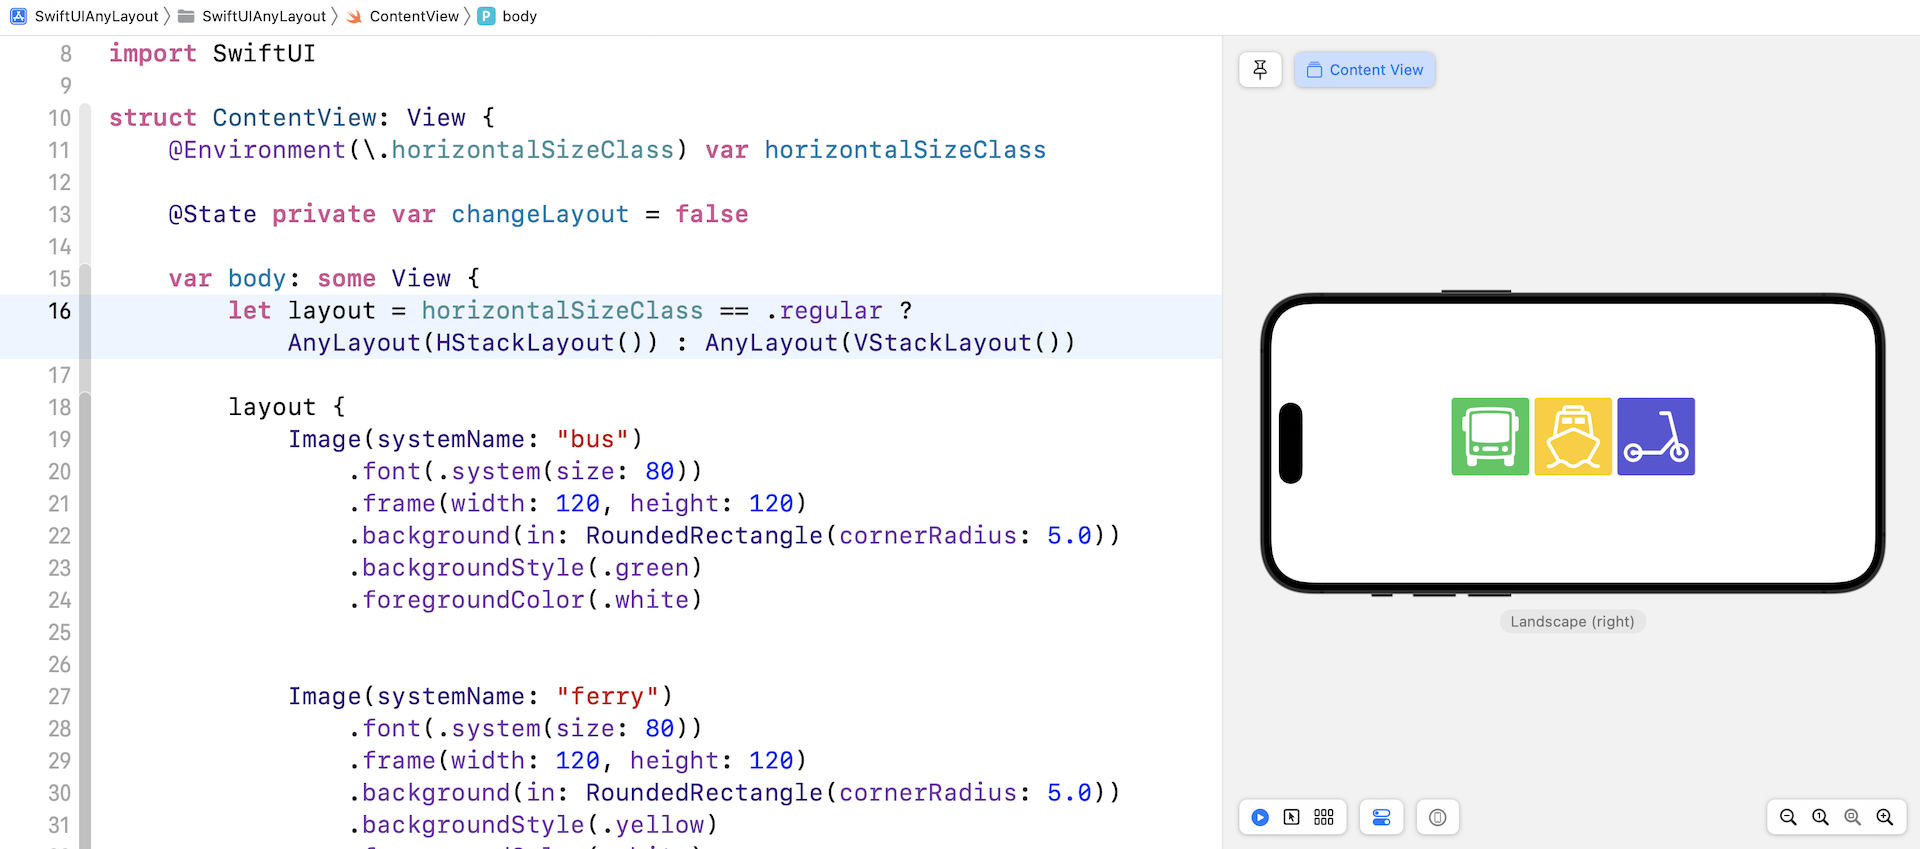
Currently, the app lets users change the layout by tapping the stack view. In some applications, you may want to change the layout based on the device's orientation and screen size. In this case, you can capture the orientation change by using the .horizontalSizeClass variable:
@Environment(\.horizontalSizeClass) var horizontalSizeClass
And then you update the layout variable like this:
let layout = horizontalSizeClass == .regular ? AnyLayout(HStackLayout()) : AnyLayout(VStackLayout())
Say, for example, you rotate an iPhone 14 Pro Max to landscape, the layout changes to horizontally stack view.
In most cases, we use SwiftUI's built-in layout containers like HStackLayout and VStackLayout to compose layouts. What if those layout containers are not good enough for arranging the type of layouts you need? The Layout protocol introduced in iOS 16 allows you to define your own custom layout. All you need to do is define a custom layout container by creating a type that conforms to the Layout protocol and implementing its required methods:
sizeThatFits(proposal:subviews:cache:)- reports the size of the composite layout view.placeSubviews(in:proposal:subviews:cache:)- assigns positions to the container’s subviews.
Summary
The introduction of AnyLayout allows us to customize and change the UI layout with a couple lines of code. This definitely helps us build more elegant and engaging UIs. In the earlier demo, I showed you how to switch layouts based on the screen orientation. In fact, you can apply the same technique to other scenarios like the size of the Dynamic Type.
For reference, you can download the complete project here: