- Made by AppCoda
- Contact us / Support
- Tweet this book
- Preface
- 1. Introduction to SwiftUI
- 2. Getting Started with SwiftUI and Working with Text
- 3. Working with Images
- 4. Layout User Interfaces with Stacks
- 5. Understanding ScrollView and Building a Carousel UI
- 6. Working with SwiftUI Buttons and Gradient
- 7. Understanding State and Binding
- 8. Implementing Path and Shape for Line Drawing and Pie Charts
- 9. Basic Animations and Transitions
- 10. Understanding Dynamic List, ForEach and Identifiable
- 11. Working with Navigation UI and Navigation Bar Customization
- 12. Playing with Modal Views, Floating Buttons and Alerts
- 13. Building a Form with Picker, Toggle and Stepper
- 14. Data Sharing with Combine and Environment Objects
- 15. Building a Registration Form with Combine and View Model
- 16. Working with Swipe-to-Delete, Context Menu and Action Sheets
- 17. Using Gestures
- 18. Displaying an Expandable Bottom Sheet Using Presentation Detents
- 19. Creating a Tinder-like UI with Gestures and Animations
- 20. Creating an Apple Wallet like Animation and View Transition
- 21. Working with JSON, Slider and Data Filtering
- 22. Building a ToDo app with Core Data
- 23. Integrating UIKit with SwiftUI Using UIViewRepresentable
- 24. Creating a Search Bar View and Working with Custom Binding
- 25. Putting Everything Together to Build a Real World App
- 26. Creating an App Store like Animated View Transition
- 27. Building an Image Carousel
- 28. Building an Expandable List View Using OutlineGroup
- 29. Building Grid Layout Using LazyVGrid and LazyHGrid
- 30. Creating an Animated Activity Ring with Shape and Animatable
- 31. Working with AnimatableModifier and LibraryContentProvider
- 32. Working with TextEditor to Create Multiline Text Fields
- 33. Using matchedGeometryEffect to Create View Animations
- 34. ScrollViewReader and Grid Animation
- 35. Working with Tab View and Tab Bar Customization
- 36. Using AsyncImage in SwiftUI for Loading Images Asynchronously
- 37. Implementing Search Bar Using Searchable
- 38. Creating Bar Charts and Line Charts with the Charts Framework
- 39. Capturing Text within Image Using Live Text APIs
- 40. How to Use ShareLink for Sharing Data Like Text and Photos
- 41. Using ImageRenderer to Convert SwiftUI Views into Images
- 42. Creating PDF Documents Using ImageRenderer
- 43. Using Gauge to Display Progress and Create a Speedometer
- 44. Creating Grid Layout Using Grid APIs
- 45. Switching Layout with AnyLayout
- Published with GitBook
Chapter 10
Understanding List, ForEach and Identifiable
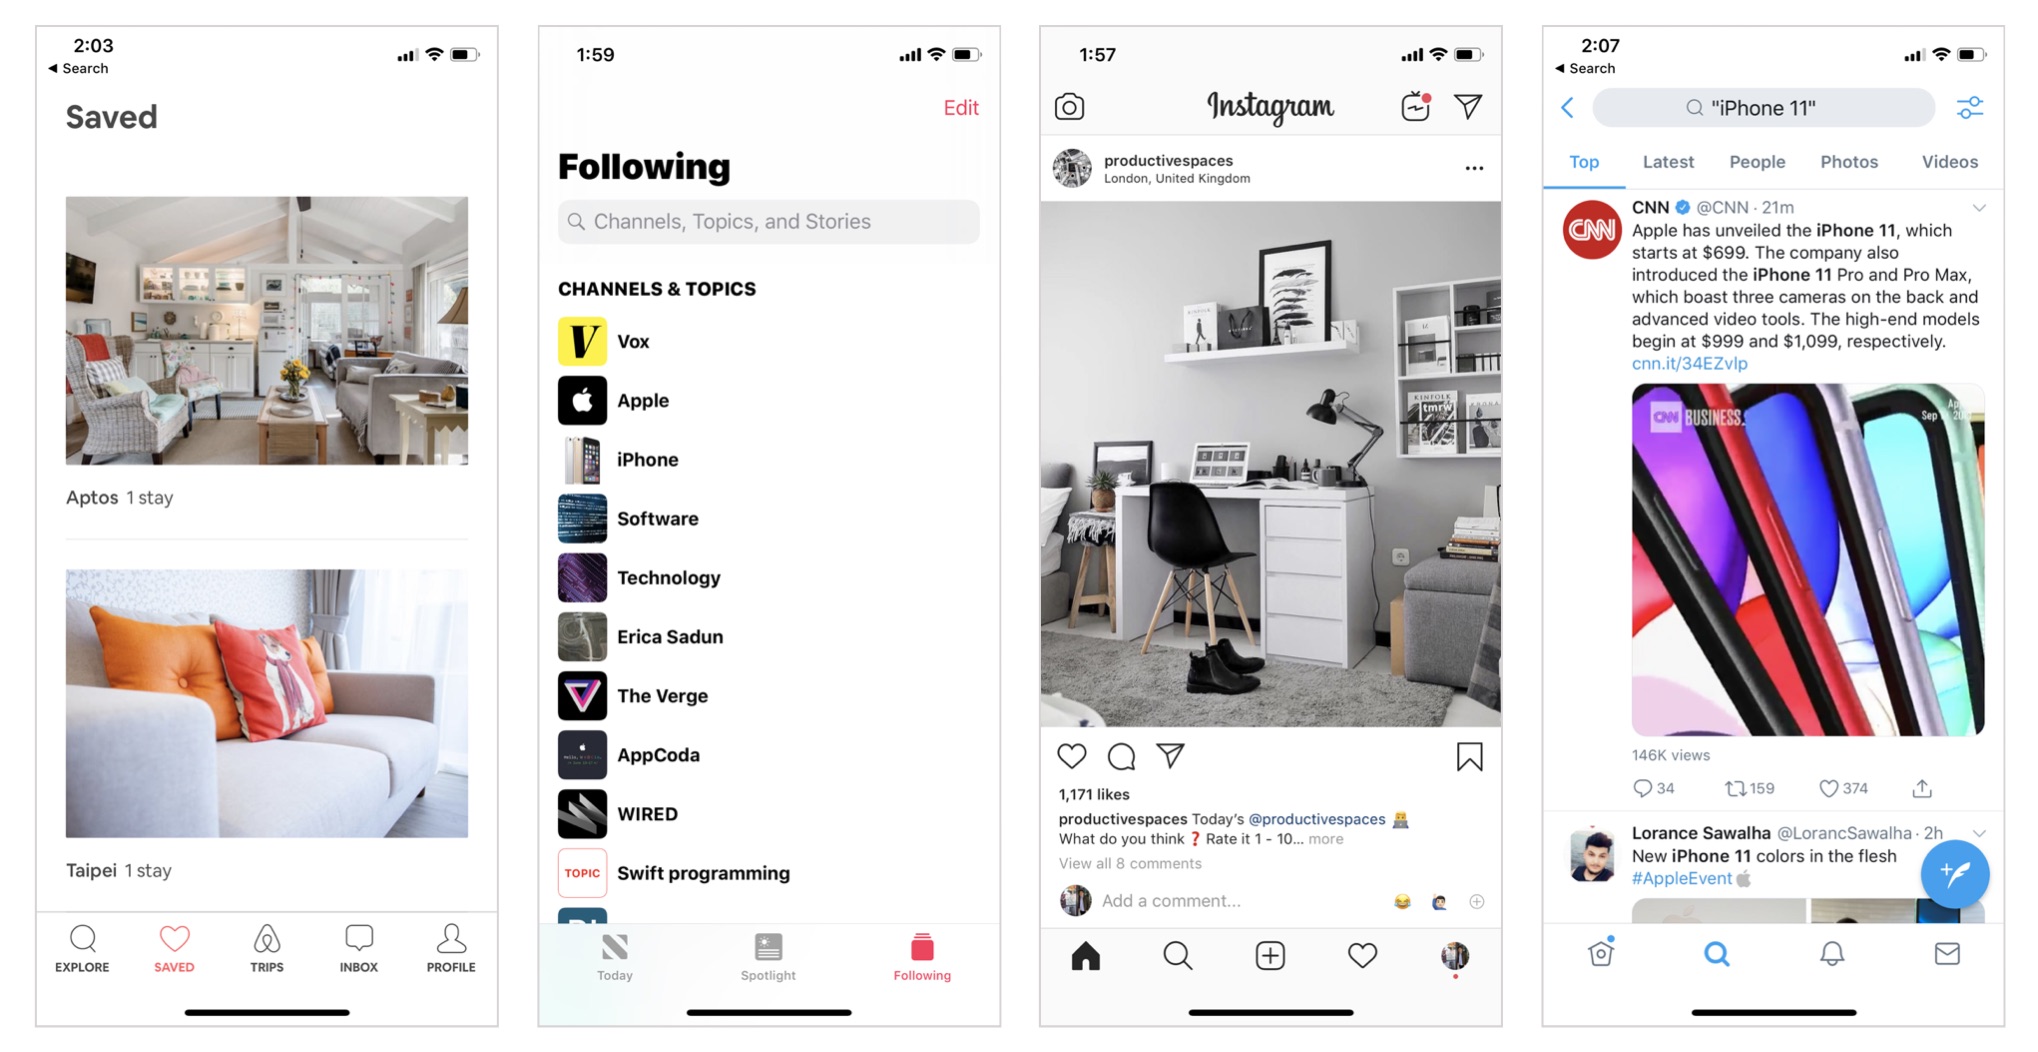
In UIKit, UITableView is one of the most common UI controls in iOS. If you've developed apps with UIKit before, you know that a table view can be used for presenting a list of data. This UI control is commonly found in content-based app such as newspaper apps. Figure 1 shows you some list/table views that you can find in popular apps like Instagram, Twitter, Airbnb, and Apple News.
Instead of using UITableView, we use List in Swift UI to present rows of data. If you've built a table view with UIKit before, you know it'll take you a bit of work to implement a simple table view. It'll take even more effort to build a table view with custom cell layout. SwiftUI simplifies this whole process. With just a few lines of code, you will be able to list data in table form. Even if you need to customize the layout of the rows, it only requires minimal effort.
Feeling confused? No worries. You'll understand what I mean in a while.
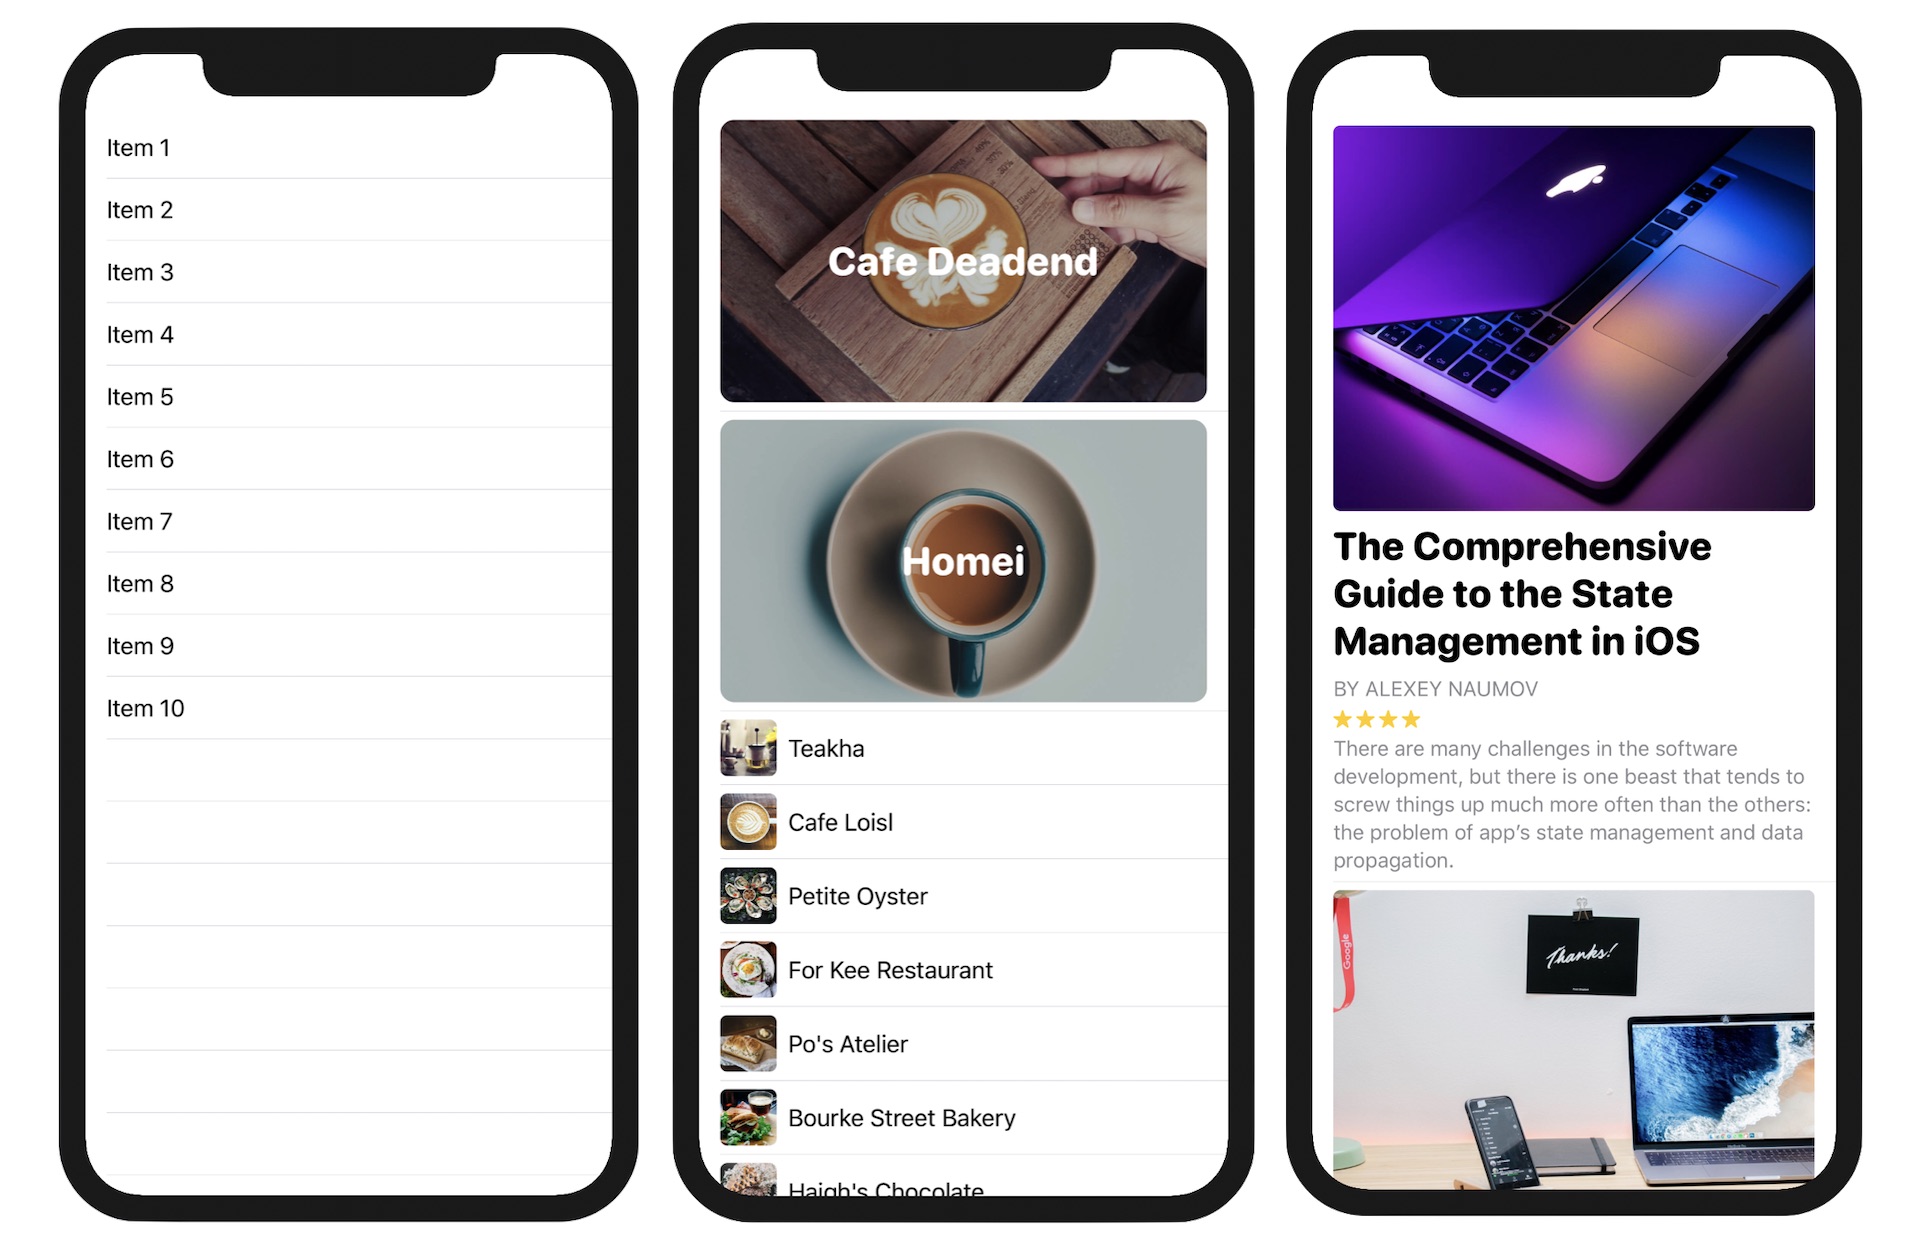
In this chapter, we will start with a simple list. Once you understand the basics, I will show you how to present a list of data with a more complex layout as shown in figure 2.
Creating a Simple List
Let's begin with a simple list. First, fire up Xcode and create a new project using the App template. In the next screen, set the product name to SwiftUIList (or whatever name you like) and fill in all the required values. Make sure you select SwiftUI for the Interface option.
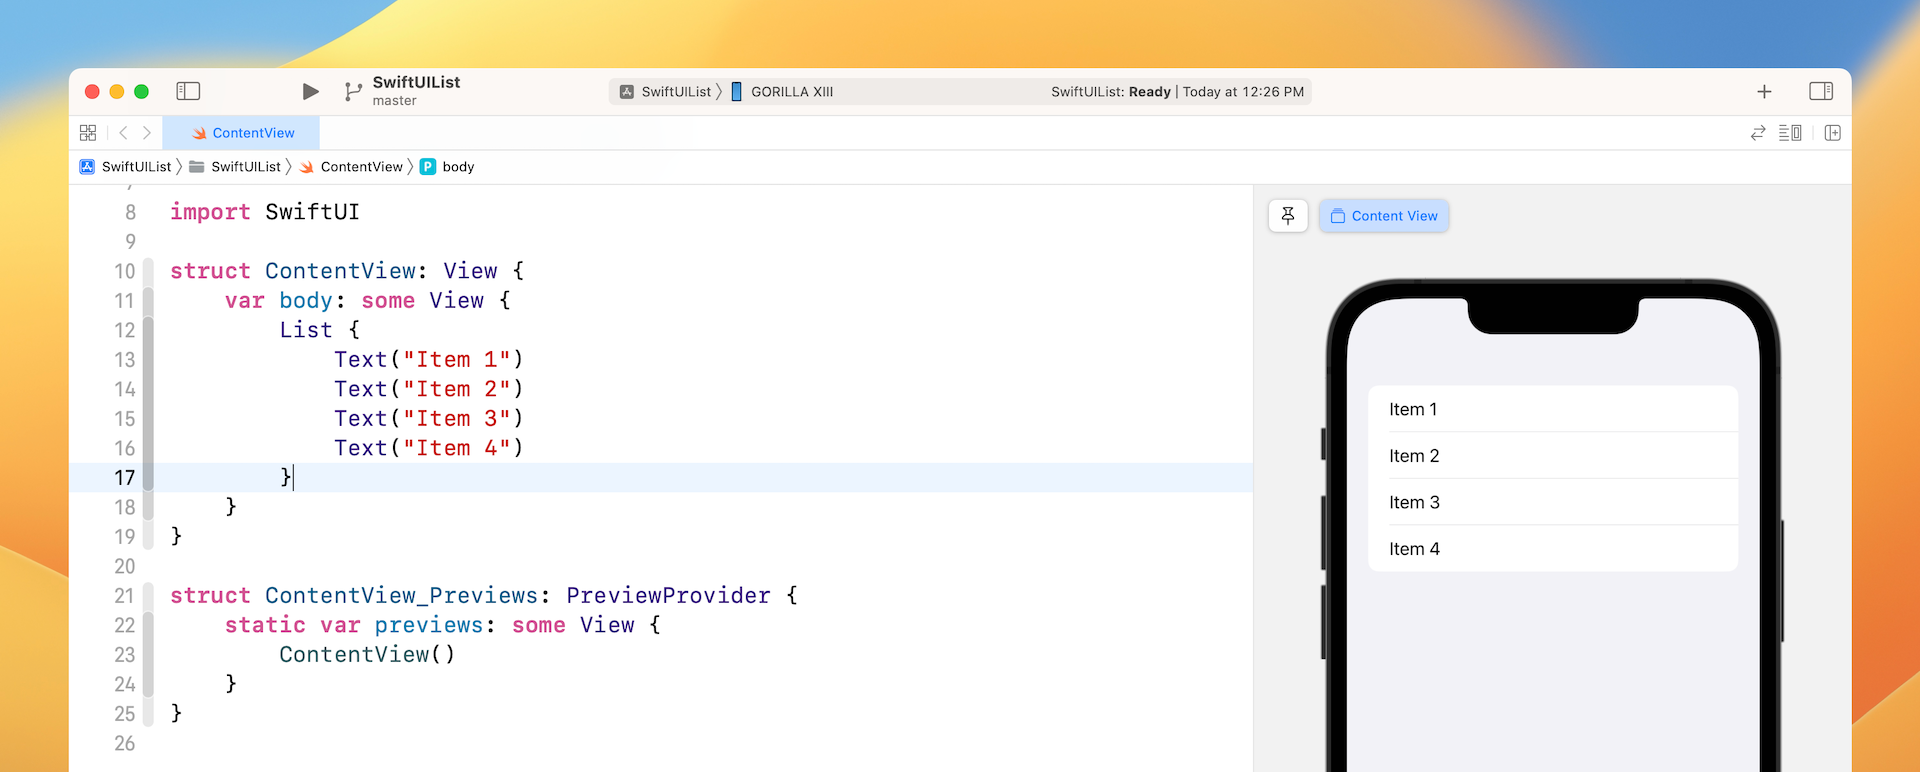
Xcode will generate the "Hello World" code in the ContentView.swift file. Replace the "Hello World" text object with the following:
struct ContentView: View {
    var body: some View {
        List {
            Text("Item 1")
            Text("Item 2")
            Text("Item 3")
            Text("Item 4")
        }
    }
}
That's all the code you need to build a simple list or table. When you embed the text views in a List, the list view will present the data in rows. Here, each row shows a text view with different description.
The same code snippet can be written like this using ForEach:
struct ContentView: View {
    var body: some View {
        List {
            ForEach(1...4, id: \.self) { index in
                Text("Item \(index)")
            }
        }
    }
}
Since the text views are very similar, you can use ForEach in SwiftUI to create views in a loop.
A structure that computes views on demand from an underlying collection of of identified data.
- Apple's official documentation (https://developer.apple.com/documentation/swiftui/foreach)
You can provide ForEach with a collection of data or a range. But one thing you have to take note of is that you need to tell ForEach how to identify each of the items in the collection. The parameter id is for this purpose. Why does ForEach need to identify the items uniquely? SwiftUI is powerful enough to update the UI automatically when some/all items in the collection are changed. To make this possible, it needs an identifier to uniquely identify the item when it's updated or removed.
In the code above, we pass ForEach a range of values to loop through. The identifier is set to the value itself (i.e. 1, 2, 3, or 4). The index parameter stores the current value of the loop. Say, for example, it starts with the value of 1. The index parameter will have a value of 1.
Within the closure, it is the code you need to render the views. Here, we create the text view. Its description will change depending on the value of index in the loop. That's how you create 4 items in the list with different titles.
Let me show you one more technique. The same code snippet can be further rewritten like this:
struct ContentView: View {
    var body: some View {
        List {
            ForEach(1...4, id: \.self) {
                Text("Item \($0)")
            }
        }
    }
}
You can omit the index parameter and use the shorthand $0, which refers the first parameter of the closure.
Let's further rewrite the code to make it even more simple. You can pass the collection of data to the List view directly. Here is the code:
struct ContentView: View {
    var body: some View {
        List(1...4, id: \.self) {
            Text("Item \($0)")
        }
    }
}
As you can see, you only need a couple lines of code to build a simple list/table.
Creating a List View with Text and Images
Now that you know how to create a simple list, let's see how to work with a more complex layout. In most cases, the items of a list view contain both text and images. How do you implement that? If you know how Image, Text, VStack, and HStack work, you should have some ideas about how to create a complex list.
If you've read our book, Beginning iOS Programming with Swift, this example should be very familiar to you. Let's use it as an example and see how easy it is to build the same table with SwiftUI.
To build the table using UIKit, you'll need to create a table view or table view controller and then customize the prototype cell. Furthermore, you'll have to code the table view data source to provide the data. That's quite a lot of steps to build a table UI. Let's see how the same table view is implemented in SwiftUI.
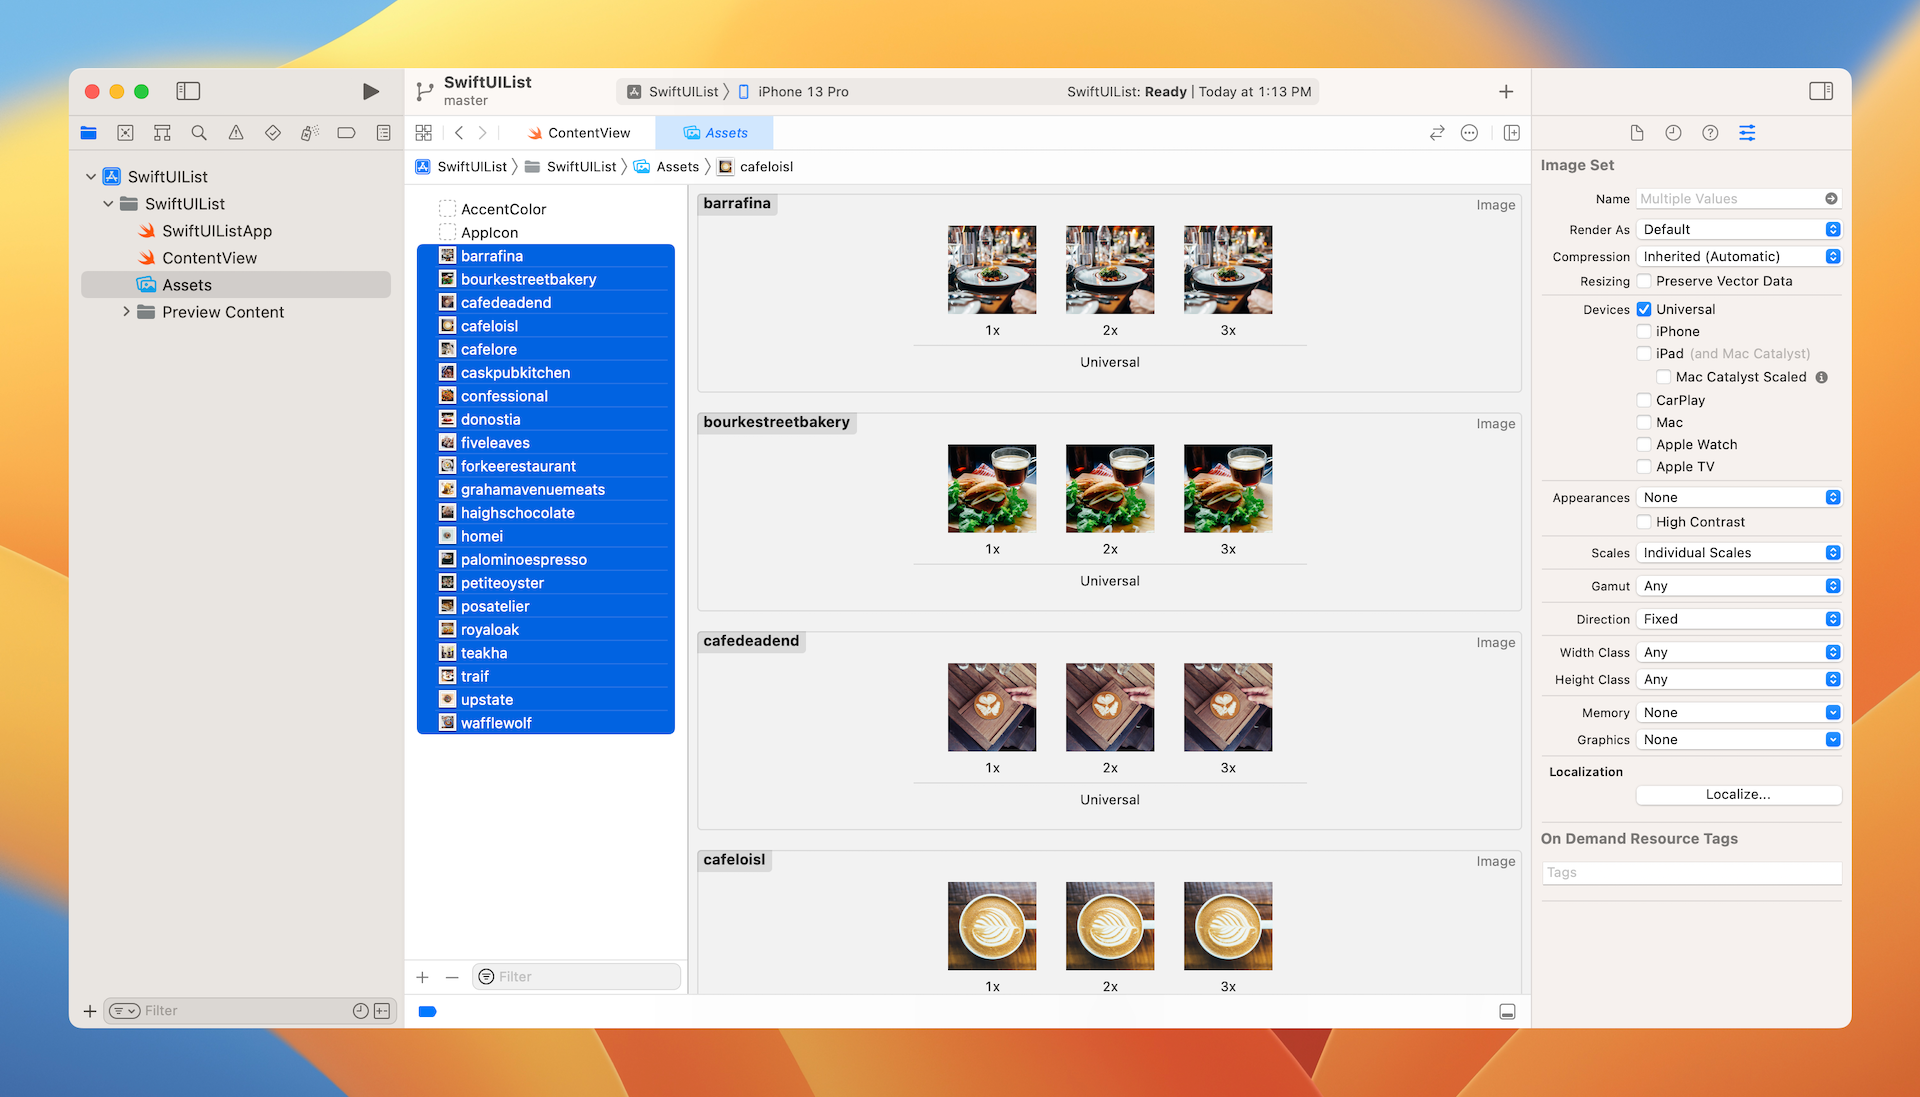
First, download the image pack from https://www.appcoda.com/resources/swiftui/SwiftUISimpleTableImages.zip. Unpack the zip file and import all the images to the asset catalog.
Now switch over to ContentView.swift to code the UI. First, let's declare two arrays in ContentView. These arrays are for storing restaurant names and images. Here is the complete code:
struct ContentView: View {

    var restaurantNames = ["Cafe Deadend", "Homei", "Teakha", "Cafe Loisl", "Petite Oyster", "For Kee Restaurant", "Po's Atelier", "Bourke Street Bakery", "Haigh's Chocolate", "Palomino Espresso", "Upstate", "Traif", "Graham Avenue Meats And Deli", "Waffle & Wolf", "Five Leaves", "Cafe Lore", "Confessional", "Barrafina", "Donostia", "Royal Oak", "CASK Pub and Kitchen"]

    var restaurantImages = ["cafedeadend", "homei", "teakha", "cafeloisl", "petiteoyster", "forkeerestaurant", "posatelier", "bourkestreetbakery", "haighschocolate", "palominoespresso", "upstate", "traif", "grahamavenuemeats", "wafflewolf", "fiveleaves", "cafelore", "confessional", "barrafina", "donostia", "royaloak", "caskpubkitchen"]

    var body: some View {
        List(1...4, id: \.self) {
            Text("Item \($0)")
        }
    }
}
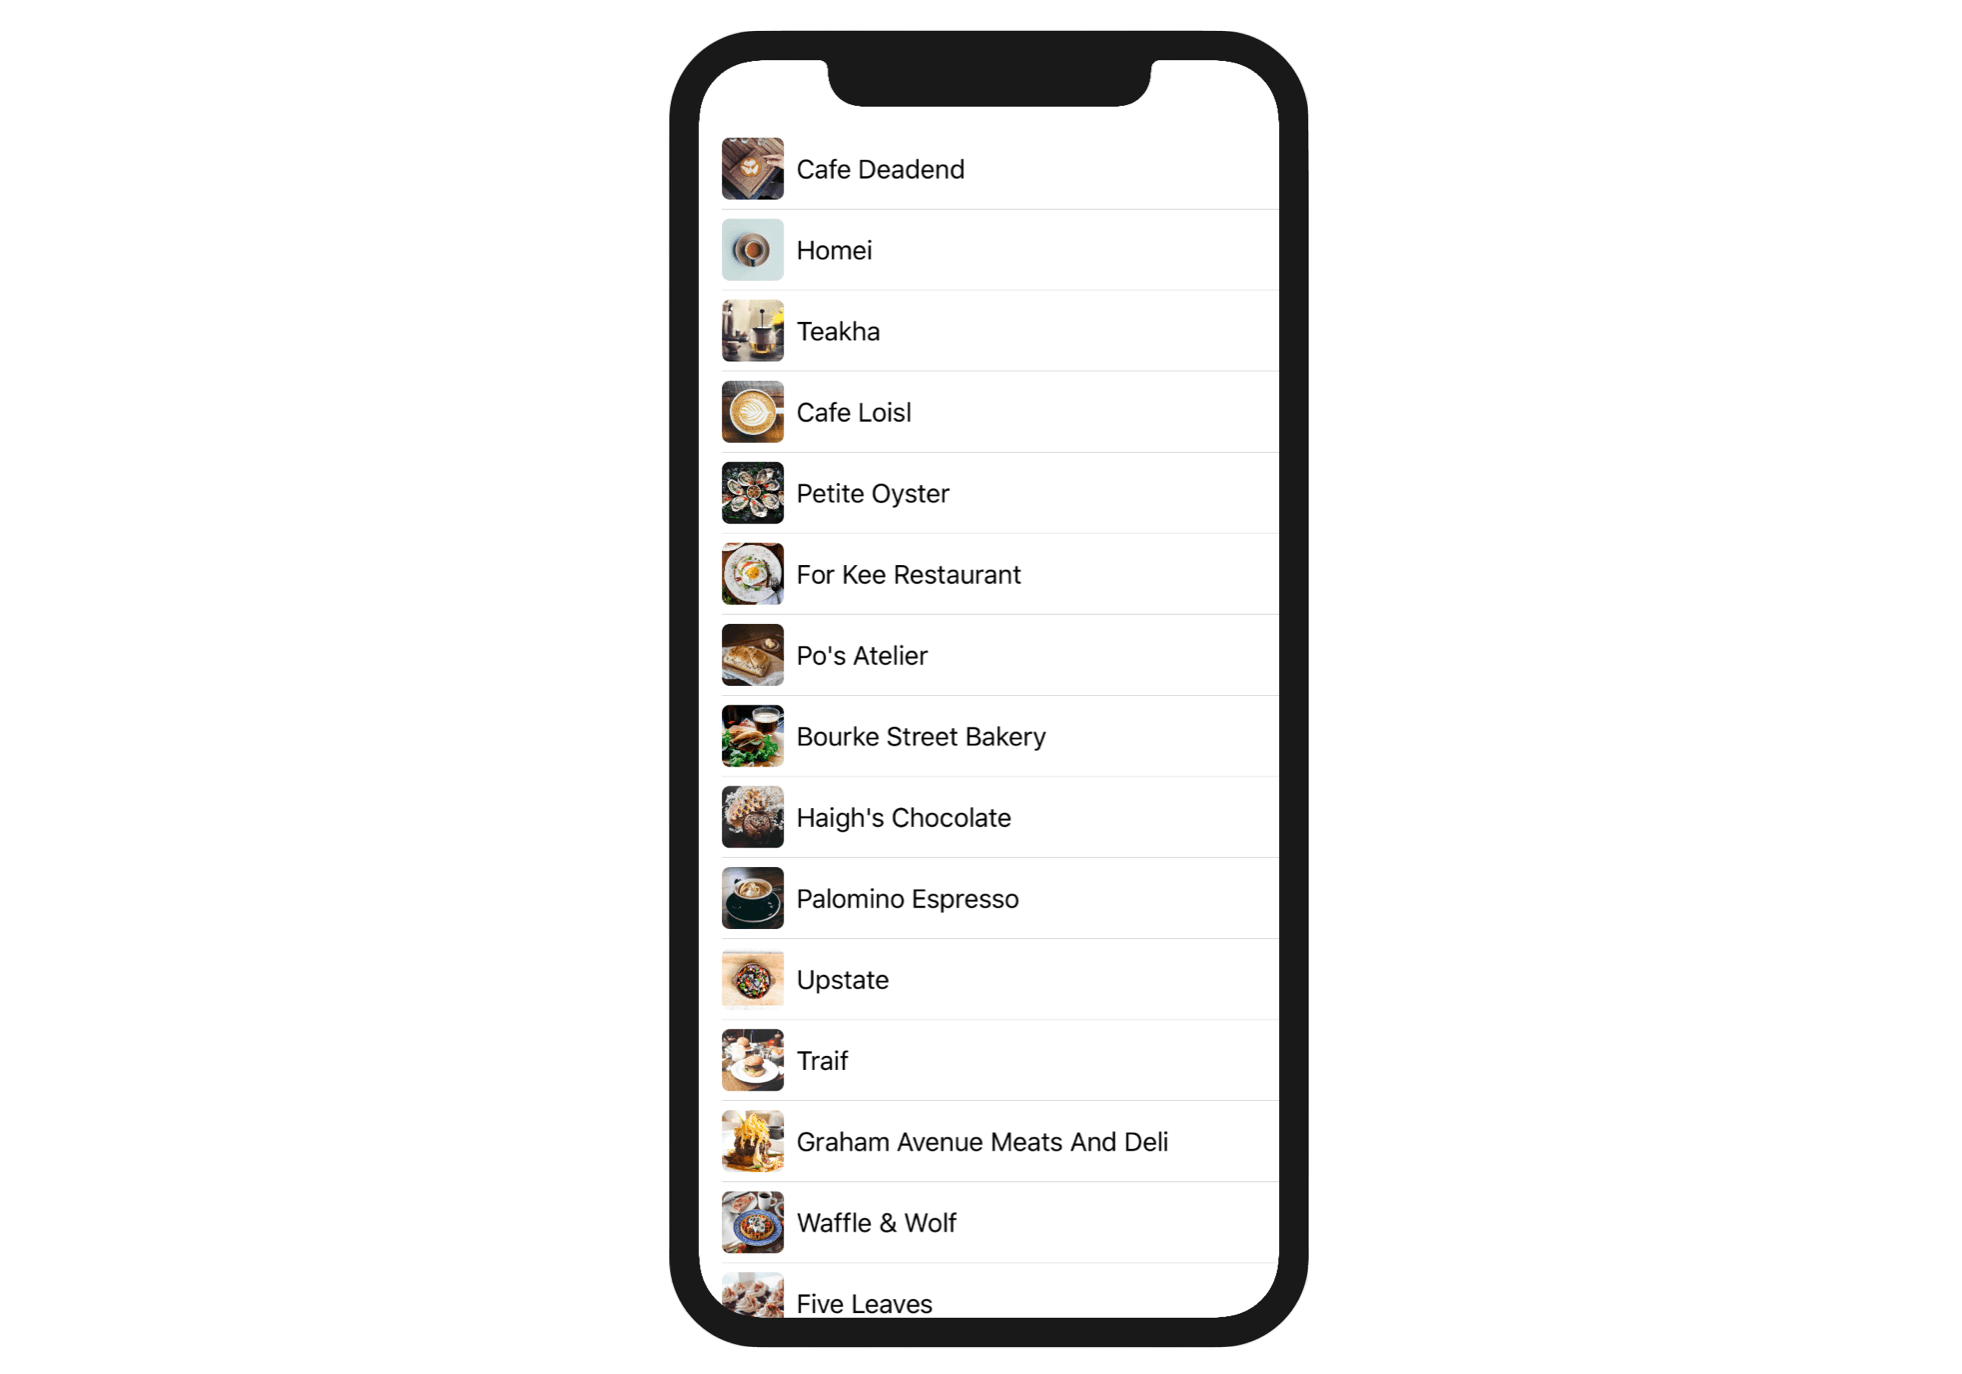
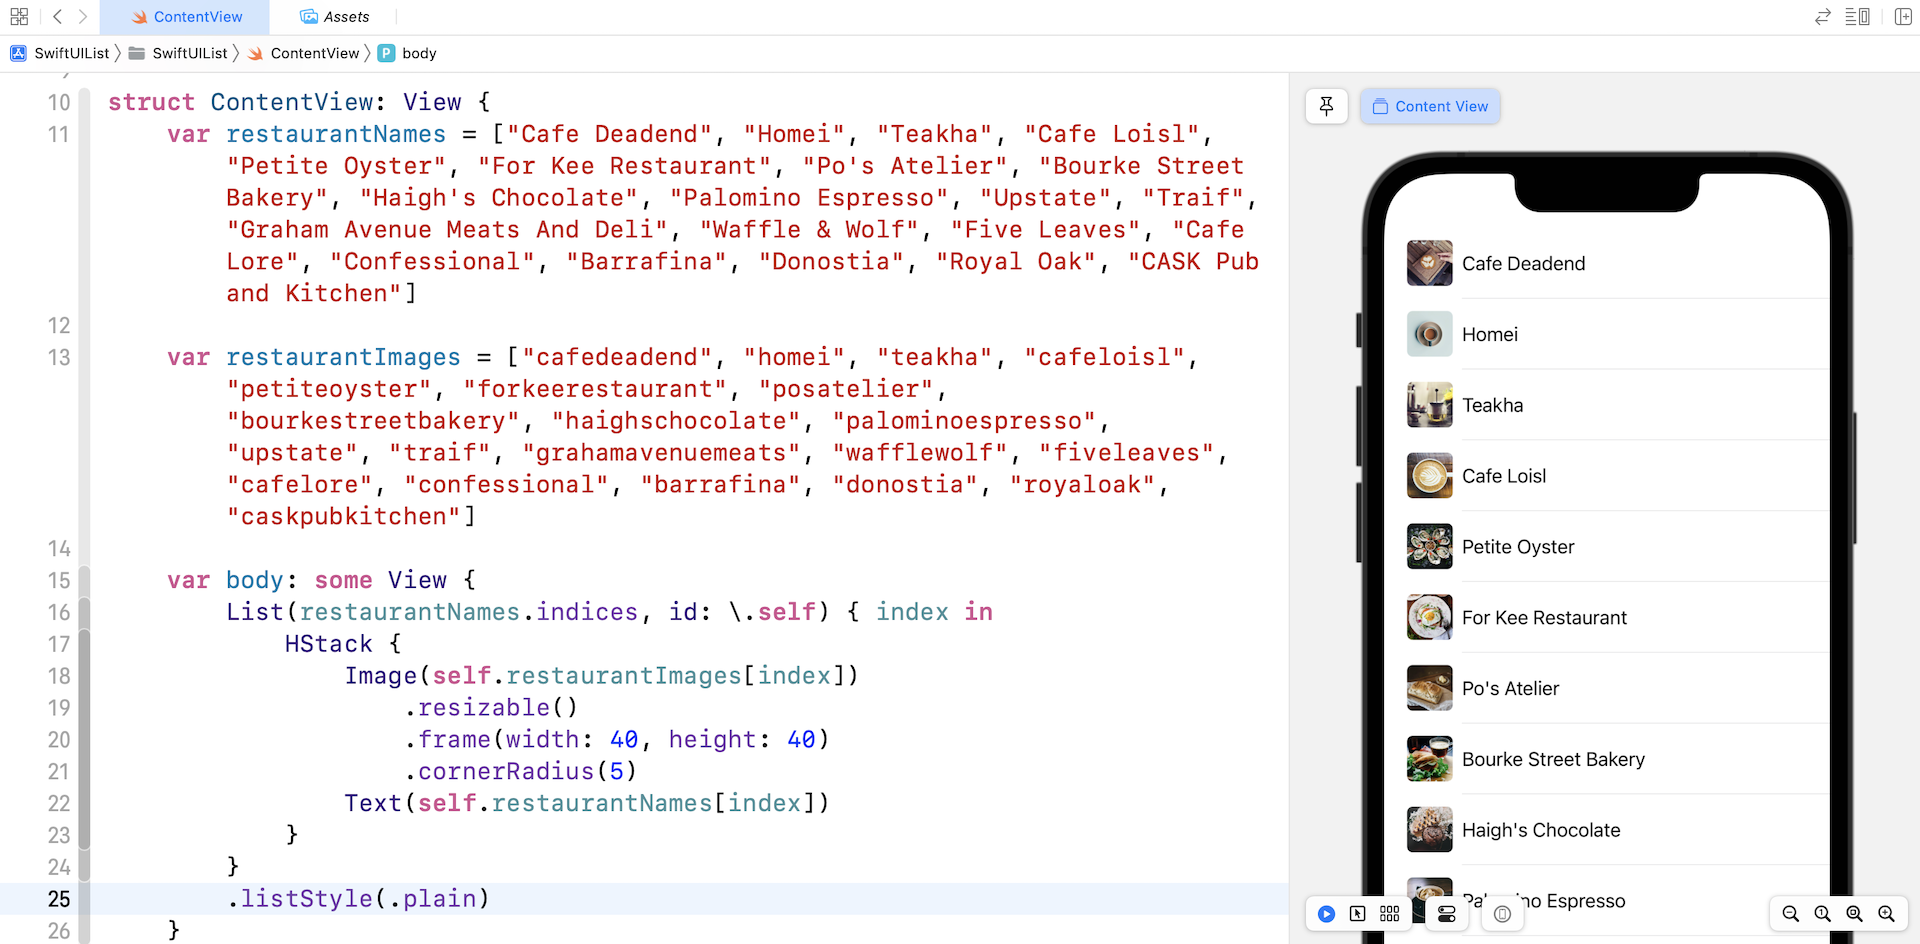
Both arrays have the same number of items. The restaurantNames array stores the name of the restaurants, the restaurantImages array stores the name of the images you just imported. To create a list view like that shown in figure 4, all you need to do is update the body variable like this:
var body: some View {
    List(restaurantNames.indices, id: \.self) { index in
        HStack {
            Image(self.restaurantImages[index])
                .resizable()
                .frame(width: 40, height: 40)
                .cornerRadius(5)
            Text(self.restaurantNames[index])
        }
    }
    .listStyle(.plain)
}
We've made a few changes in the code. First, instead of a fixed range, we pass the array of restaurant names (i.e. restaurantNames.indices) to the List view. The restaurantNames array has 21 items so we'll have a range from 0 to 20 (arrays are 0 indexed). This only works when both arrays are of the same size as the index of one is used as an index for the other array.
In the closure, the code was updated to create the row layout. I'll not go into the details as the code is similar to previous stack views we've created. To change the style of the List view, we attached the listStyle modifier and set the style to plain.
With less than 10 lines of code, we have created a list (or table) view with a custom layout.
Working with a Collection of Data
As mentioned before, List can take in a range or a collection of data. You've learned how to work with range. Let's see how to use List with an array of restaurant objects.
Instead of holding the restaurant data in two separate arrays, we'll create a Restaurant struct to better organize the data. This struct has two properties: name and image. Insert the following code at the end of the ContentView.swift file:
struct Restaurant {
    var name: String
    var image: String
}
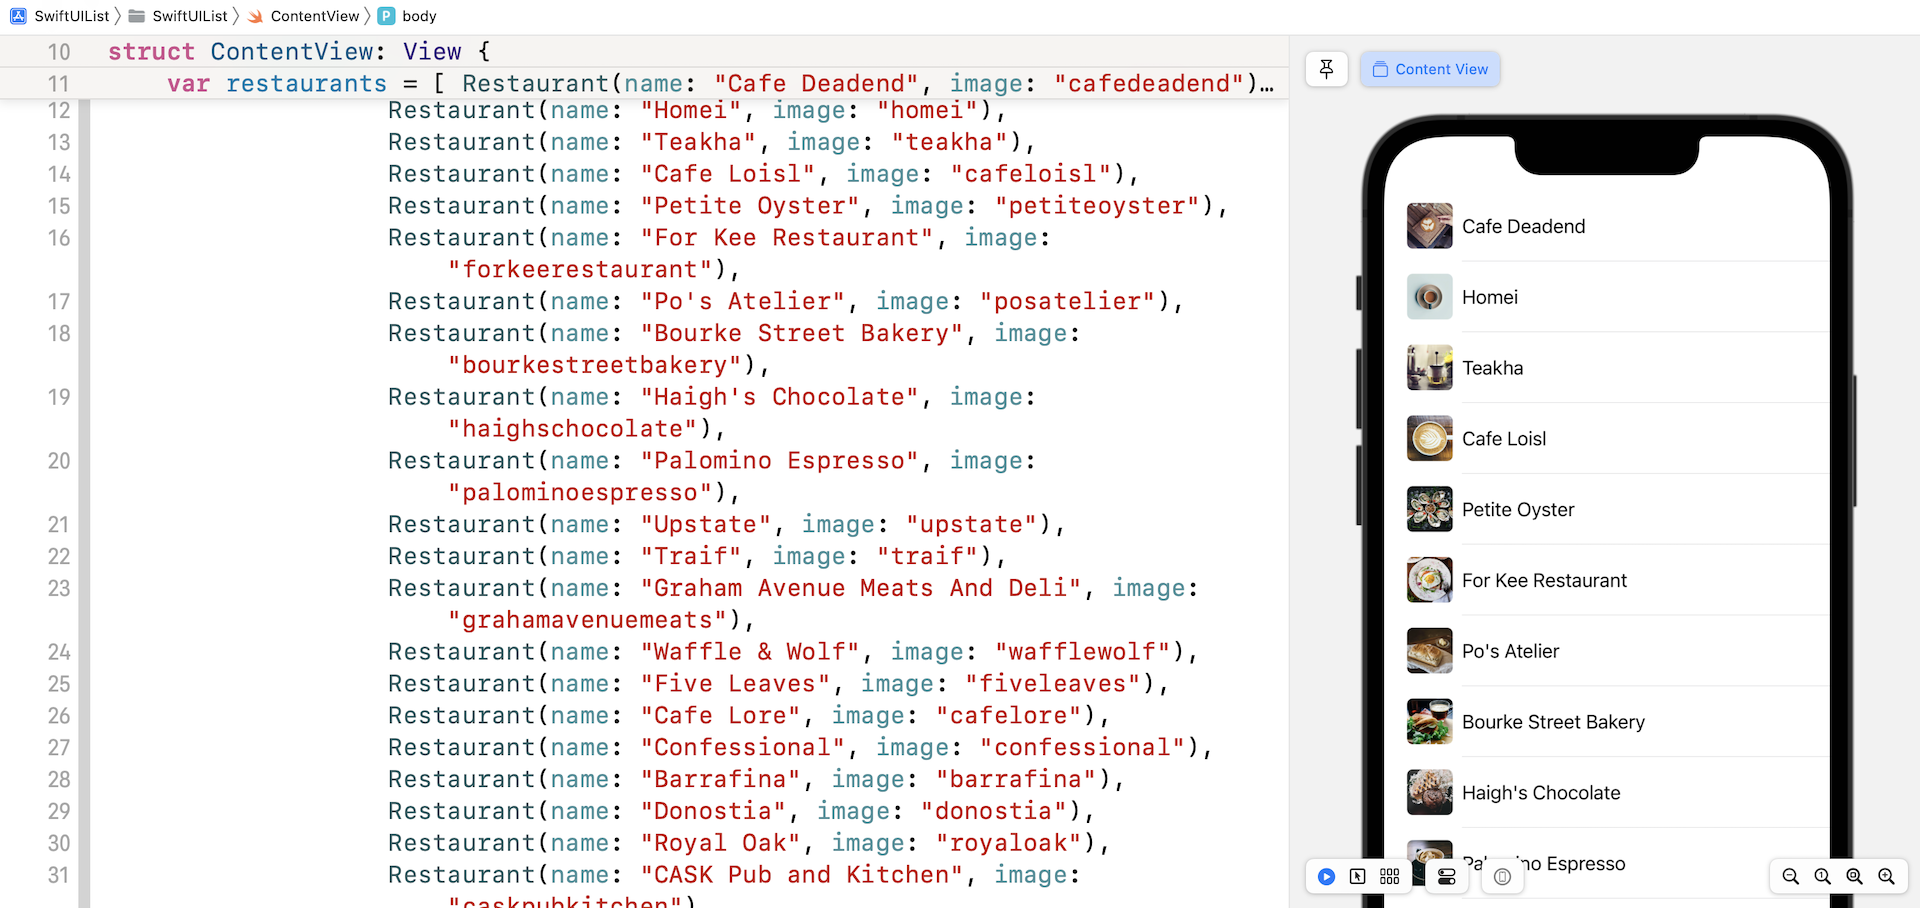
With this struct, we can combine both restaurantNames and restaurantImages arrays into a single array. Delete the restaurantNames and restaurantImages variables and replace them with this variable in ContentView:
var restaurants = [ Restaurant(name: "Cafe Deadend", image: "cafedeadend"),
               Restaurant(name: "Homei", image: "homei"),
               Restaurant(name: "Teakha", image: "teakha"),
               Restaurant(name: "Cafe Loisl", image: "cafeloisl"),
               Restaurant(name: "Petite Oyster", image: "petiteoyster"),
               Restaurant(name: "For Kee Restaurant", image: "forkeerestaurant"),
               Restaurant(name: "Po's Atelier", image: "posatelier"),
               Restaurant(name: "Bourke Street Bakery", image: "bourkestreetbakery"),
               Restaurant(name: "Haigh's Chocolate", image: "haighschocolate"),
               Restaurant(name: "Palomino Espresso", image: "palominoespresso"),
               Restaurant(name: "Upstate", image: "upstate"),
               Restaurant(name: "Traif", image: "traif"),
               Restaurant(name: "Graham Avenue Meats And Deli", image: "grahamavenuemeats"),
               Restaurant(name: "Waffle & Wolf", image: "wafflewolf"),
               Restaurant(name: "Five Leaves", image: "fiveleaves"),
               Restaurant(name: "Cafe Lore", image: "cafelore"),
               Restaurant(name: "Confessional", image: "confessional"),
               Restaurant(name: "Barrafina", image: "barrafina"),
               Restaurant(name: "Donostia", image: "donostia"),
               Restaurant(name: "Royal Oak", image: "royaloak"),
               Restaurant(name: "CASK Pub and Kitchen", image: "caskpubkitchen")
]
If you're new to Swift, each item of the array represents restaurant object containing both the name and image for each restaruant. Once you have replaced the array, you'll see an error in Xcode, complaining that the restaurantNames variable is missing. That's expected because we've just removed it.
Now update the body variable like this:
var body: some View {
    List(restaurants, id: \.name) { restaurant in
        HStack {
            Image(restaurant.image)
                .resizable()
                .frame(width: 40, height: 40)
                .cornerRadius(5)
            Text(restaurant.name)
        }
    }
    .listStyle(.plain)
}
Take a look at the parameters we pass into List. Instead of passing the range, we pass the restaurants array and tell the List to use its name property as the identifier. The List will loop through the array and let us know the current restaurant it's handling in the closure. So, in the closure, we tell the list how we want to present the restaurant row. Here, we simply present both the restaurant image and name in a HStack.
The resulting UI is still the same but the underlying code was modified to utilize List with a collection of data.
Working with the Identifiable Protocol
To help you better understand the purpose of the id parameter in List, let's make a minor change to the restaurants array. Currently, we use the name of the restaurant as an identifier. What happens when we have two records with the same restaurant name? Change Upstate (the 11th item in the array) to Homei in the restaurants array like this:
Restaurant(name: "Homei", image: "upstate")
Take note that we are only changing the value of the name property and keeping the image to upstate. Check the preview pane again and see what you get.
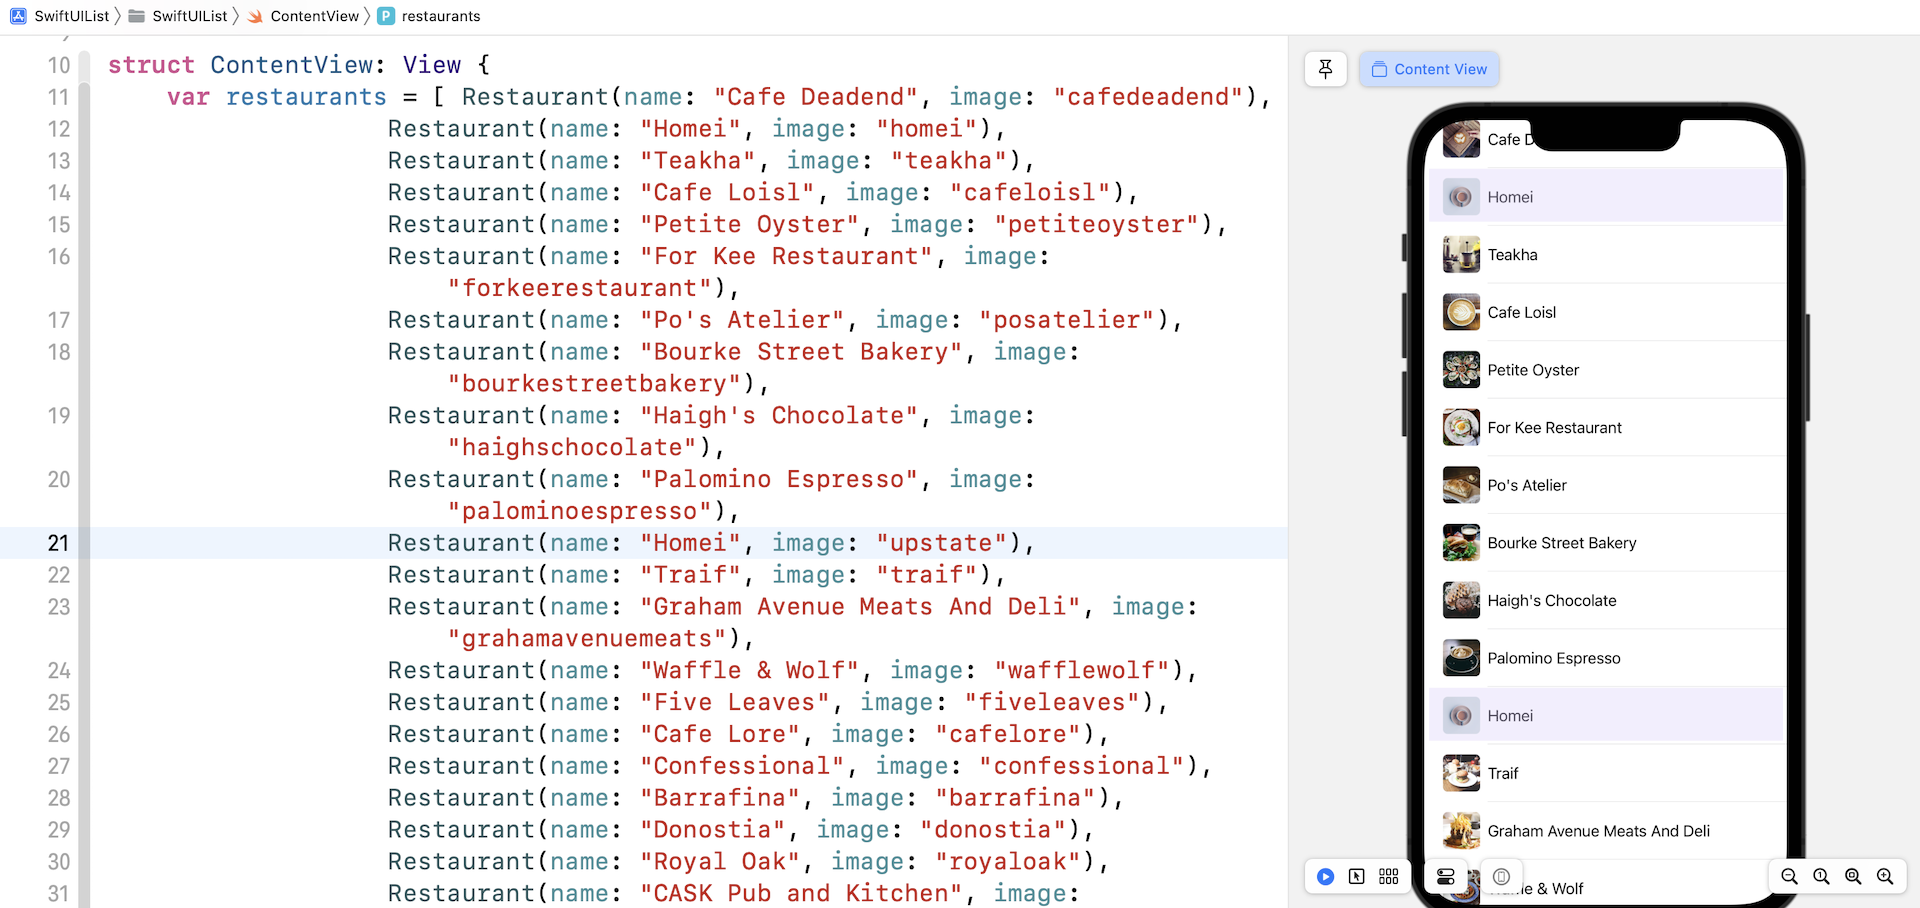
Do you see the issue (in figure 8)? We now have two records with the name Homei. You might expect the second Homei record to show the upstate image, but iOS renders two records with the same text and image. In the code, we told the List to use the restaurant's name as the unique identifier. When two restaurants have the same name, iOS considers both restaurants to be the same restaurant. Thus, it reuses the same view and renders the same image.
So, how do you fix this issue?
That's pretty easy. Instead of using the name as the identifier (ID), you should give each restaurant a unique identifier. Update the Restaurant struct like this:
struct Restaurant {
    var id = UUID()
    var name: String
    var image: String
}
In the code, we added an id property and initialized it with a unique identifier. The UUID() function is designed to generate a random identifier that is universally unique. A UUID is composed of 128-bit number, so theoretically the chance of having two same indentifers is almost zero.
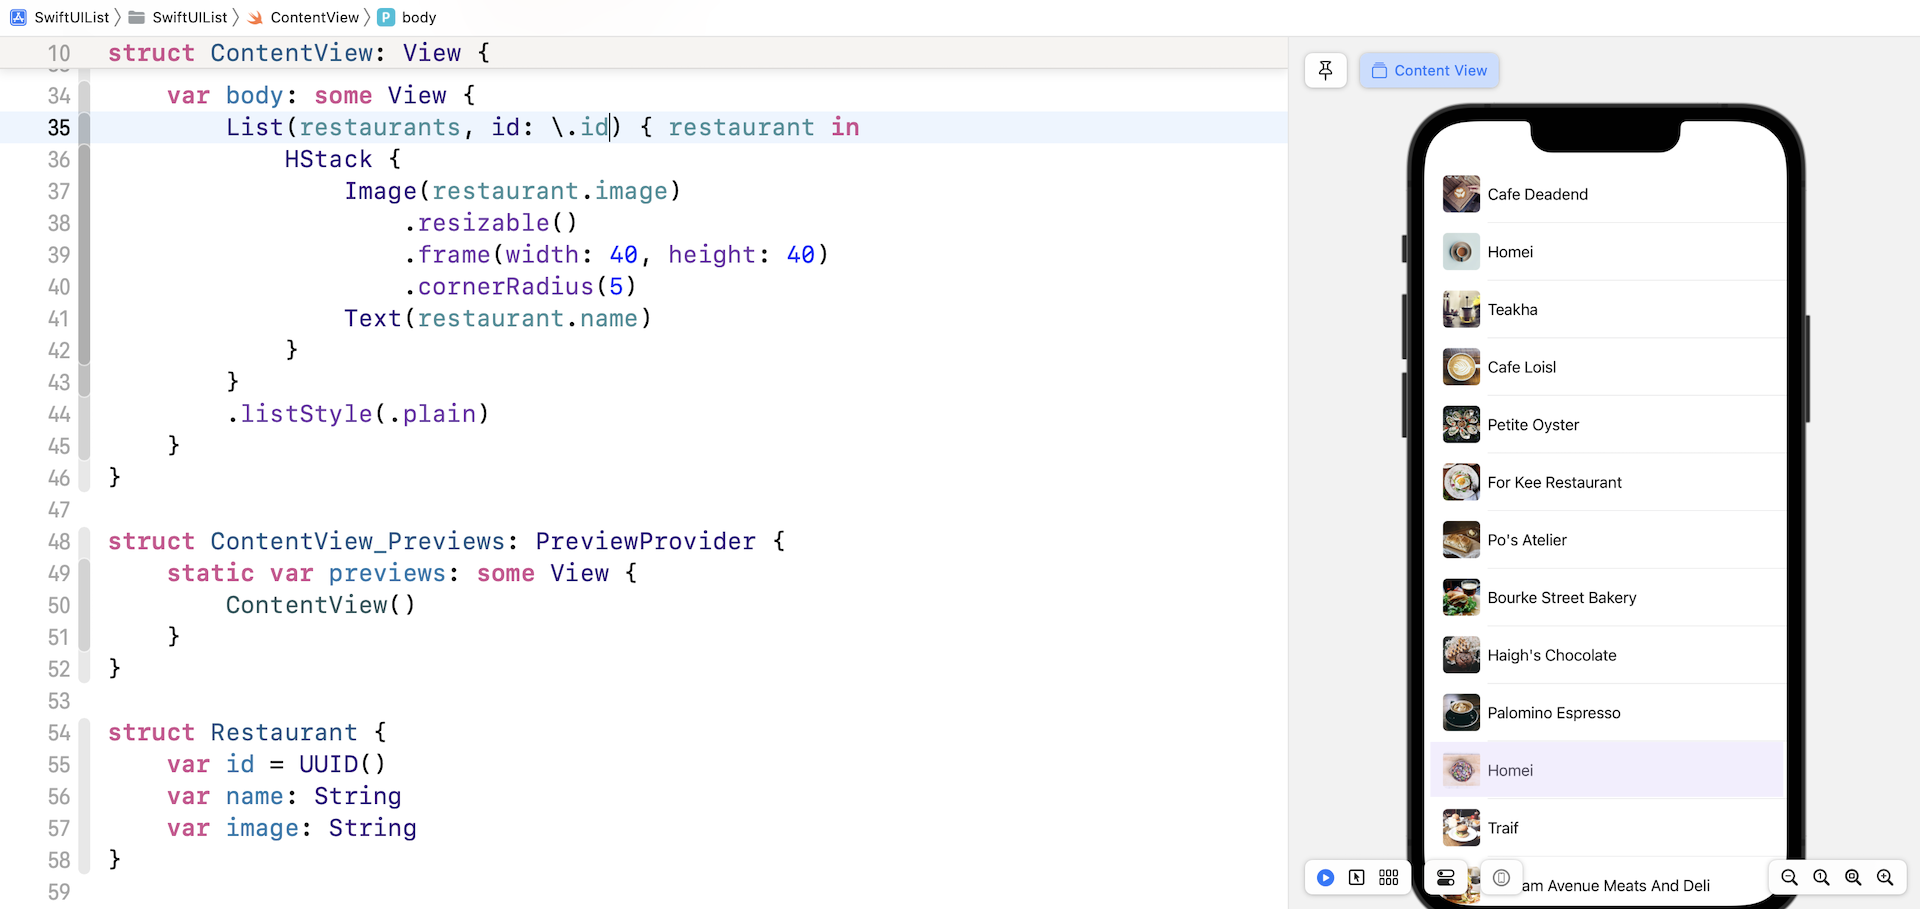
Now each restaurant has a unique ID, but we still have to make one more change for things to work. For the List, change the value of the id parameter from \.name to \.id:
List(restaurants, id: \.id)
This tells the List view to use the id property of the restaurants as the unique identifier. Take a look at the preview, the second Homei record now shows the upstate image.
We can further simplify the code by making the Restaurant struct conform to the Identifiable protocol. This protocol has only one requirement, that the type implementing the protocol should have some sort of id as a unique identifier. Update Restaurant to implement the Identifiable protocol like this:
struct Restaurant: Identifiable {
    var id = UUID()
    var name: String
    var image: String
}
Since Restaurant already provides a unique id property, this conforms to the protocol requirement.
What's the purpose of implementing the Identifiable protocol here? With the Restaurant struct conforming to the Identifiable protocol, you can initialize the List without the id parameter. You just simplified the code! Here is the updated code for the list view:
List(restaurants) { restaurant in
    HStack {
        Image(restaurant.image)
            .resizable()
            .frame(width: 40, height: 40)
            .cornerRadius(5)
        Text(restaurant.name)
    }
    .listStyle(.plain)
}
That's how you use List to present a collection of data.
Refactoring the Code
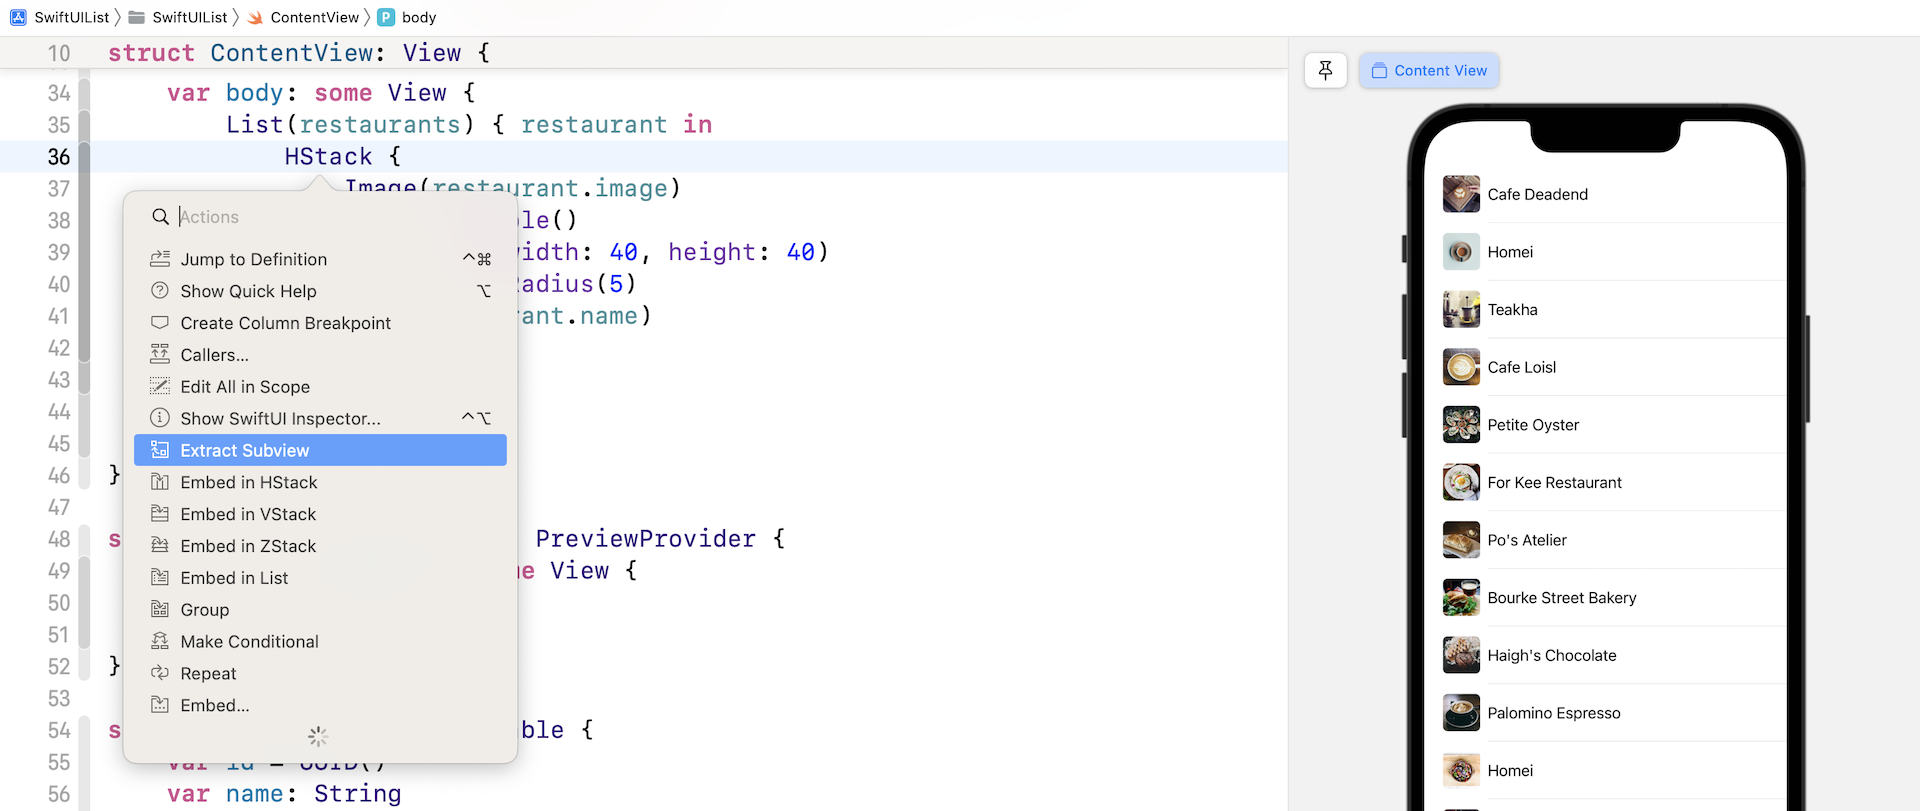
The code works very well. That said, it's always a good practice to refactor the code to make it even better. You've learned how to extract a view. Let's extract the HStack into a separate struct. Hold the command key and click HStack. Select Extract subview to extract the code. Rename the struct to BasicImageRow.
Xcode immediately shows you an error once you made the change. Since the extracted subview doesn't have a restaurant property, update the BasicImageRow struct like this to declare the restaurant property:
struct BasicImageRow: View {
    var restaurant: Restaurant

    var body: some View {
        HStack {
            Image(restaurant.image)
                .resizable()
                .frame(width: 40, height: 40)
                .cornerRadius(5)
            Text(restaurant.name)
        }
    }
}
Next, update the List view to pass the restaurant parameter:
List(restaurants) { restaurant in
    BasicImageRow(restaurant: restaurant)
}
Now everything should work without errors. The list view still looks the same but the underlying code is more readable and organized. It's also more adaptable to code change. Let's say, you create another layout for the row like this:
struct FullImageRow: View {
    var restaurant: Restaurant

    var body: some View {
        ZStack {
            Image(restaurant.image)
                .resizable()
                .aspectRatio(contentMode: .fill)
                .frame(height: 200)
                .cornerRadius(10)
                .overlay(
                    Rectangle()
                        .foregroundColor(.black)
                        .cornerRadius(10)
                        .opacity(0.2)
                )

            Text(restaurant.name)
                .font(.system(.title, design: .rounded))
                .fontWeight(.black)
                .foregroundColor(.white)
        }
    }
}
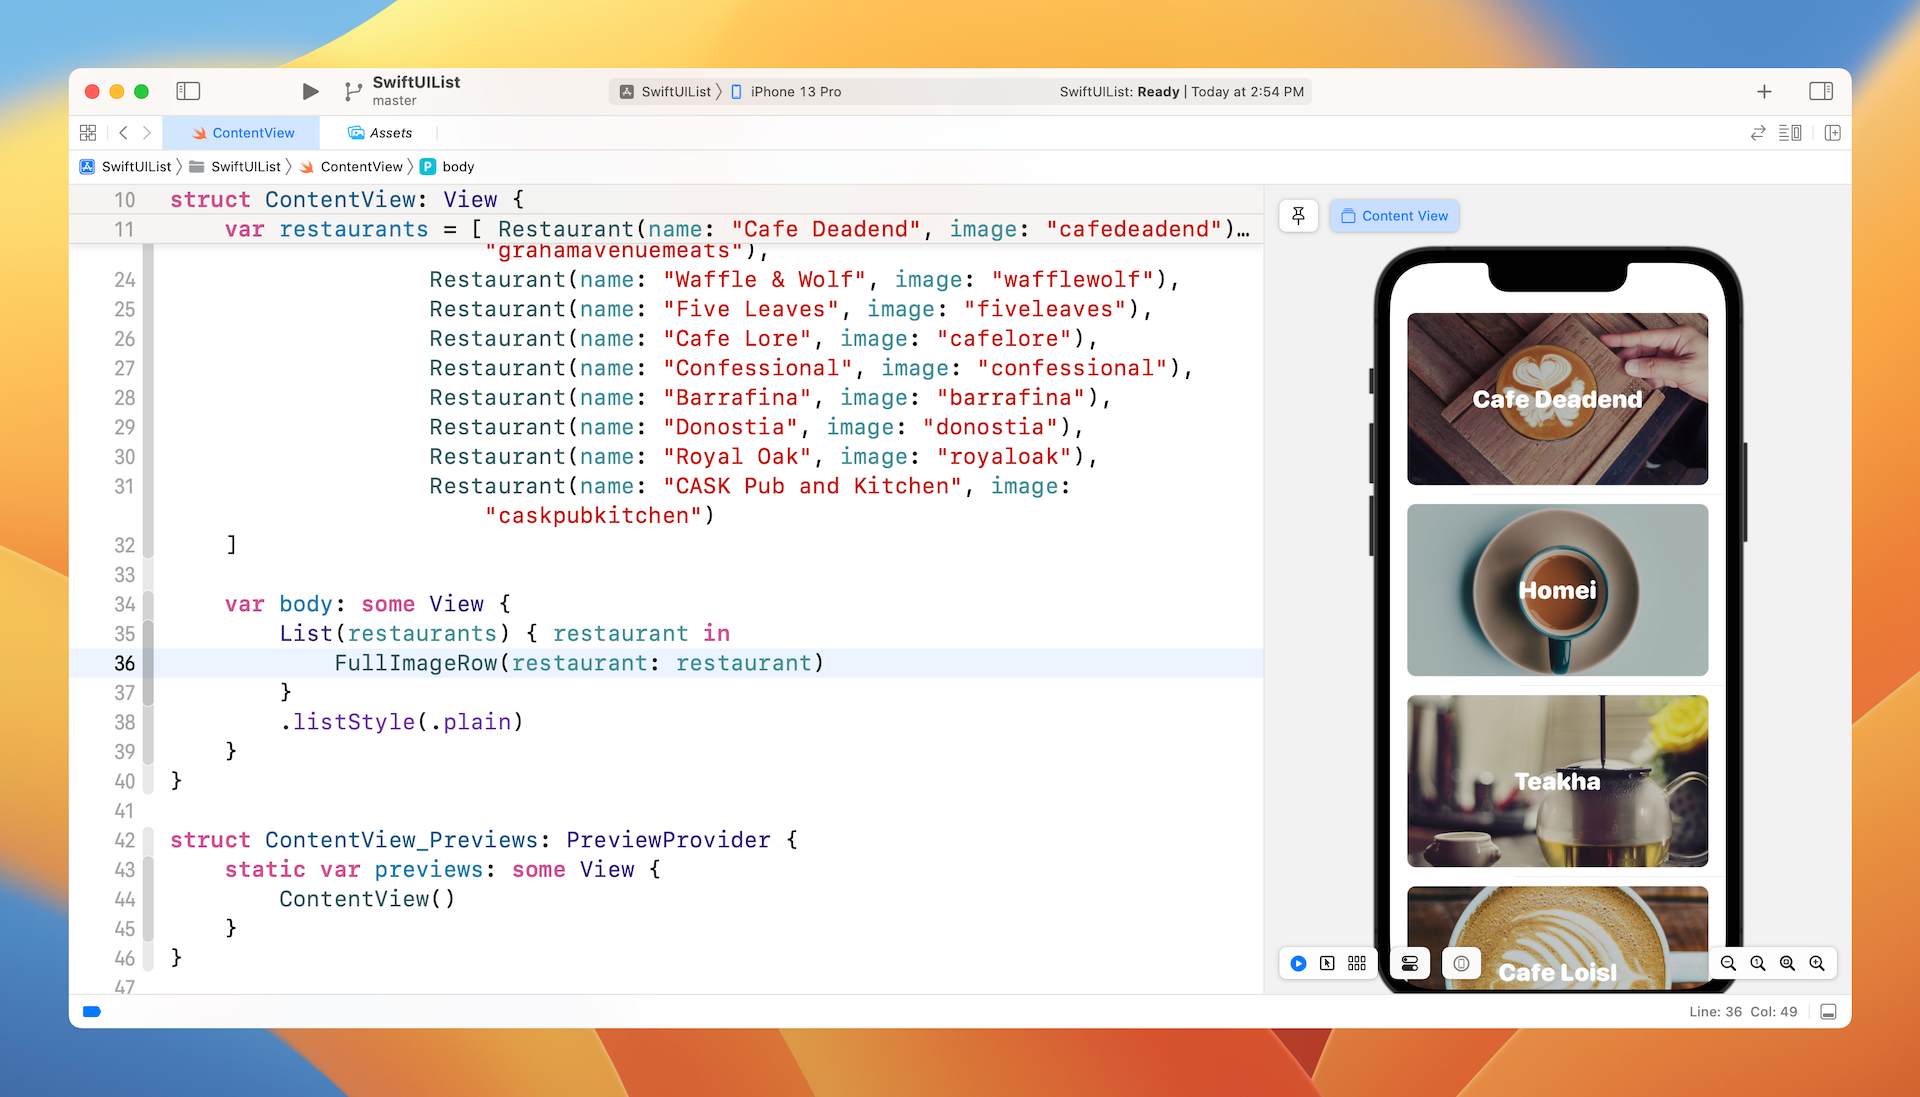
This row layout is designed to show a larger image with the restaurant name overlayed on top. Since we've refactored our code, it's very easy to change the app to use the new layout. All you need to do is replace BasicImageRow with FullImageRow in the closure of List:
List(restaurants) { restaurant in
    FullImageRow(restaurant: restaurant)
}
By changing one line of code, the app instantly switches to another layout.
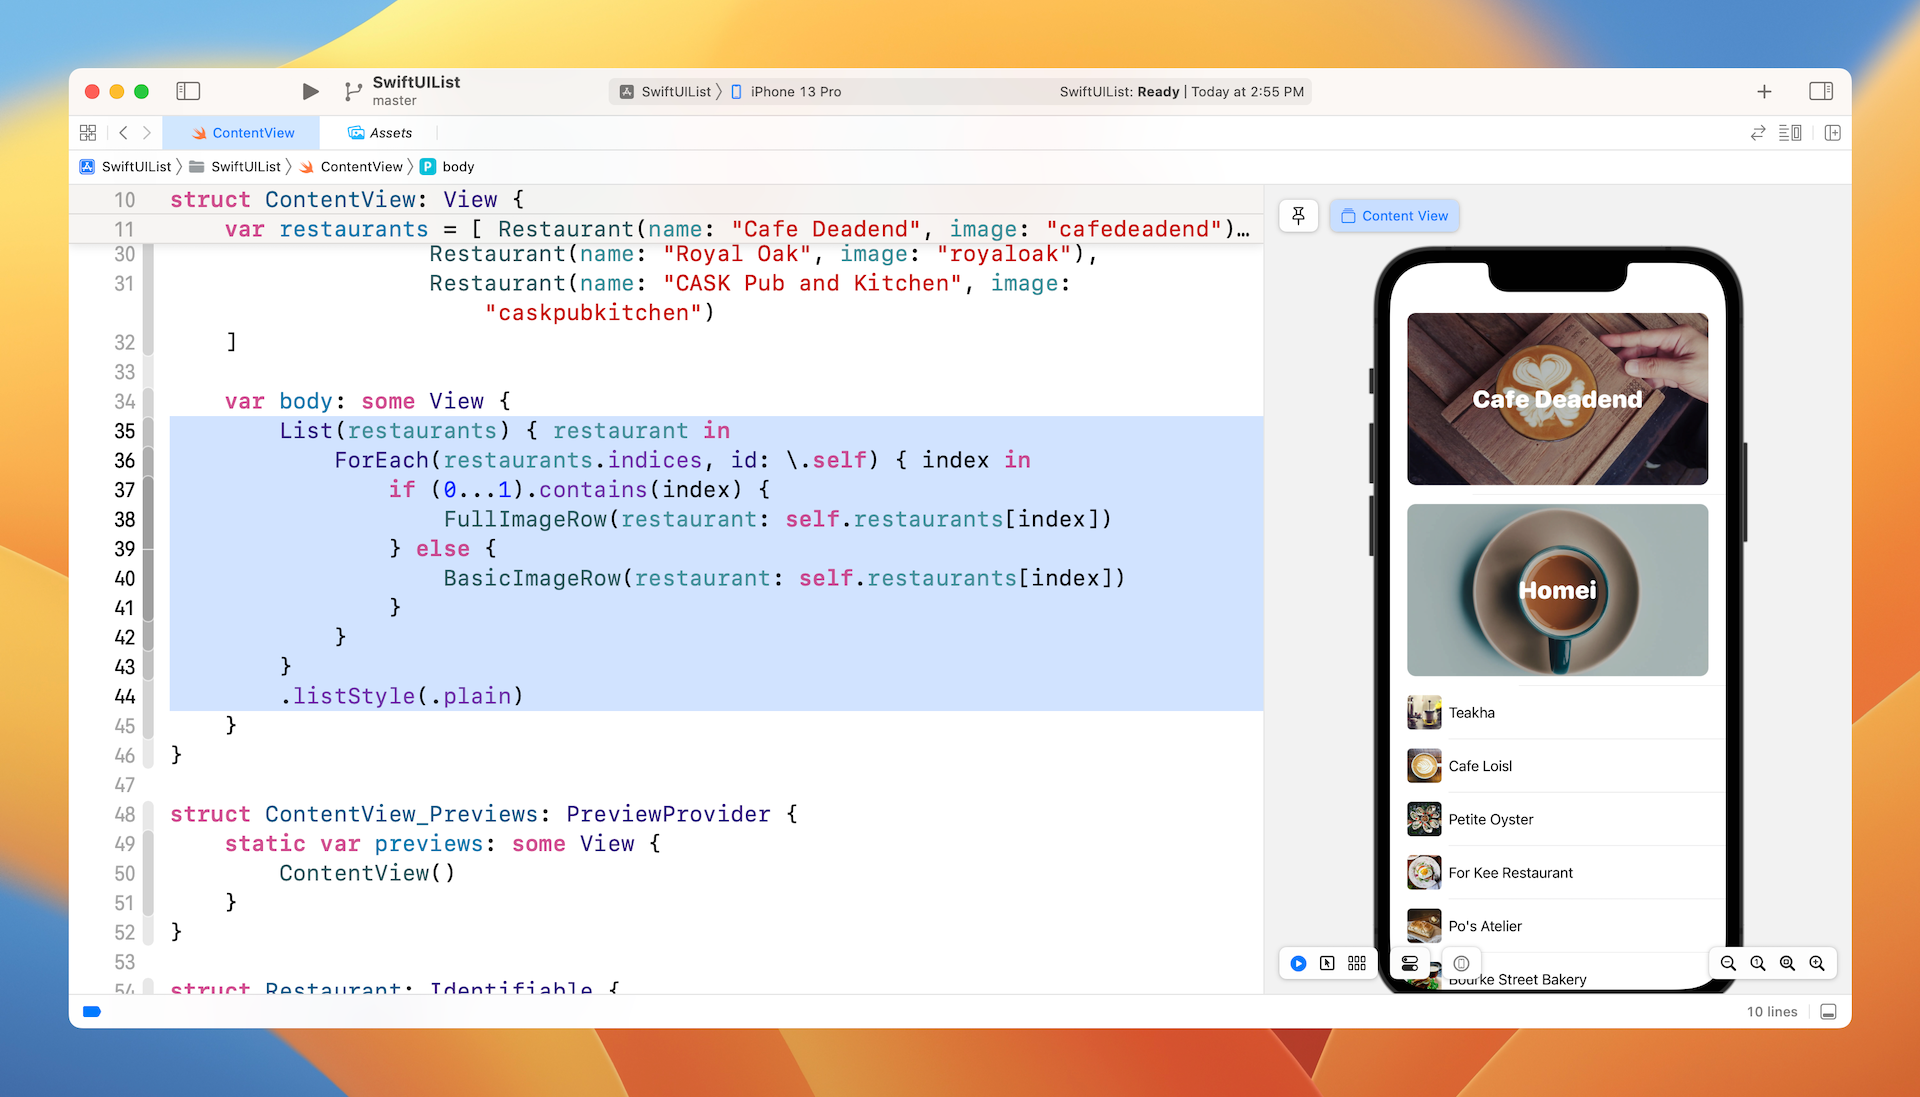
You can further mix the row layouts to build a more interesting UI. For example, our list is to use FullImageRow for the first two rows of data and the rest of the rows will utilize the BasicImageRow. To do this, you update List like this:
List {
    ForEach(restaurants.indices, id: \.self) { index in
        if (0...1).contains(index) {
            FullImageRow(restaurant: self.restaurants[index])
        } else {
            BasicImageRow(restaurant: self.restaurants[index])
        }
    }
}
.listStyle(.plain)
Since we need to retrieve the index of the rows, we pass the List the index range of the restaurant data. In the closure, we check the value of index to determine which row layout to use.
Changing the tint color of the line separator
Starting from iOS 15, Apple provided options for developers to customize the appearance of the list view. To change the tint color of the line separators, you can use the listRowSeparatorTint modifier like this:
List(restaurants) { restaurant in
    ForEach(restaurants.indices, id: \.self) { index in
        if (0...1).contains(index) {
            FullImageRow(restaurant: self.restaurants[index])
        } else {
            BasicImageRow(restaurant: self.restaurants[index])
        }
    }
    .listRowSeparatorTint(.green)
}
.listStyle(.plain)
In the code above, we change the color of the line separators to green.
Hiding the List Separators
iOS 15 also introduced one of the most anticipated features for List. You can now use the listRowSeparator modifier and set its value to .hidden to hide the separators. Here is an example:
List {
    ForEach(restaurants.indices) { index in
        if (0...1).contains(index) {
            FullImageRow(restaurant: self.restaurants[index])
        } else {
            BasicImageRow(restaurant: self.restaurants[index])
        }
    }

    .listRowSeparator(.hidden)
}
.listStyle(.plain)
The listRowSeparator modifier should be embedded inside the List view. To make the line separators appear again, you can set the value of the modifier to .visible. Or you can simply remove the listRowSeparator modifier.
If you want to have a finer control on the line separators, you can use an alternate version of .listRowSeparator by specifying the edges parameter. Say, for example, if you want to keep the separator at the top of the list view, you can write the code like this:
.listRowSeparator(.hidden, edges: .bottom)
Customizing the Background of the Scrolling Area
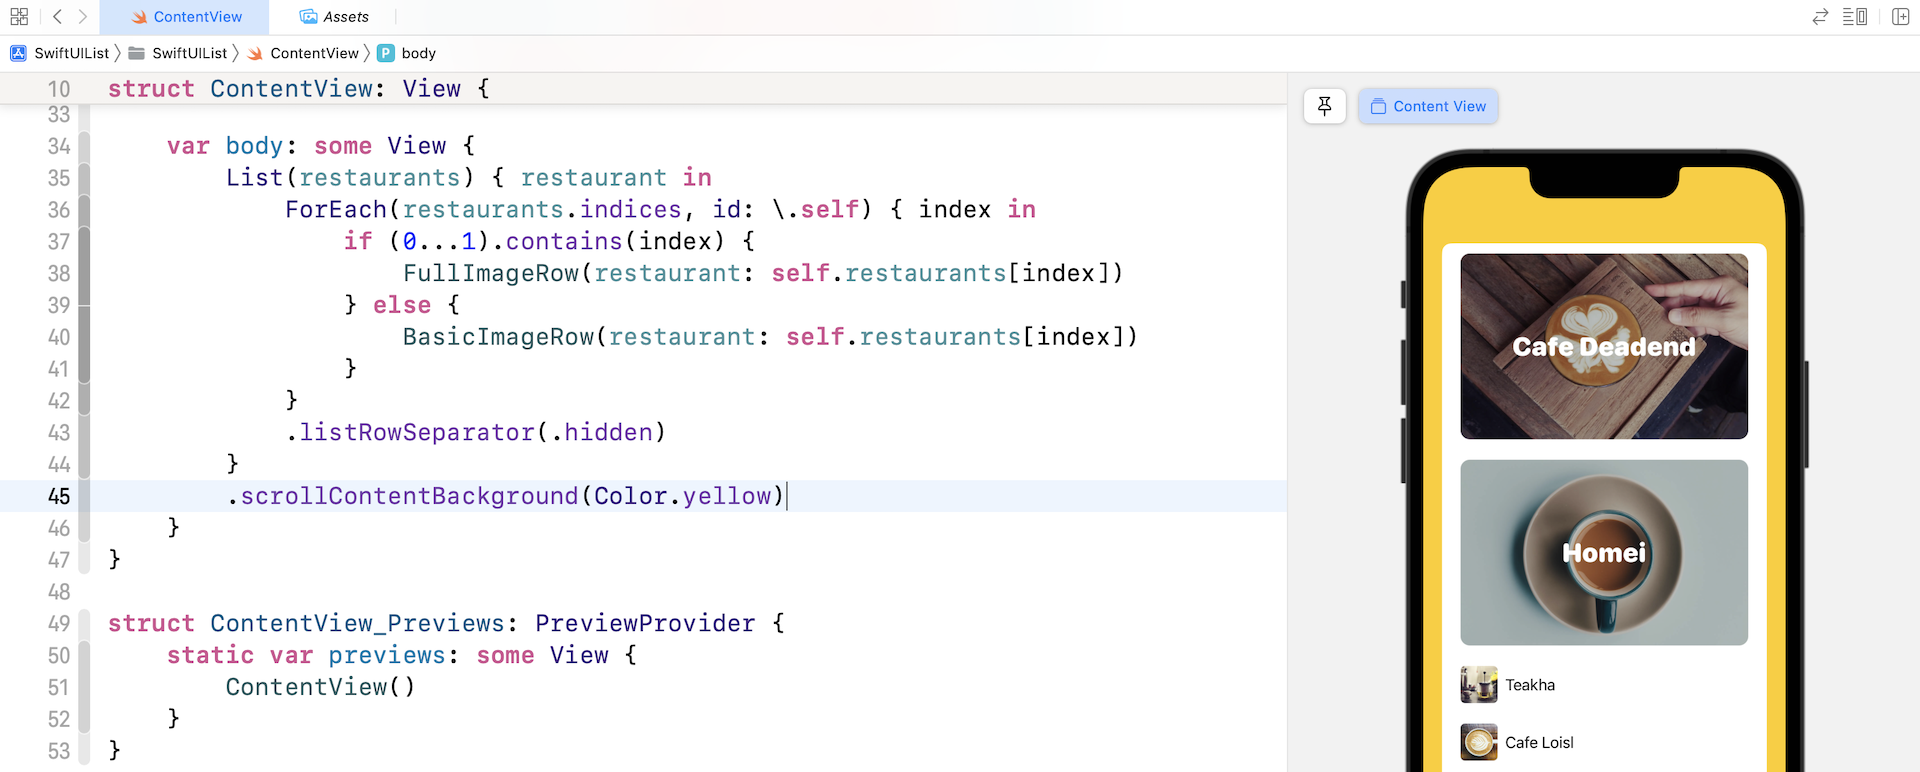
In iOS 16, you can customize the color of the scrollable area of the list view. Simply attach the scrollContentBackground modifier to the List view and set it to your preferred color. Here is an example:
List(restaurants) { restaurant in
    .
    .
    .
}
.scrollContentBackground(Color.yellow)
Other than using a solid color, you can use an image as the background. Update the code like this to have a try:
List(restaurants) { restaurant in
    .
    .
    .
}
.background {
    Image("homei")
        .resizable()
        .scaledToFill()
        .clipped()
}
.scrollContentBackground(Color.clear)
We use the background modifier to set the background image. Then we set the scrollContentBackground modifier to Color.clear to make the scrollable area transparent.
Exercise
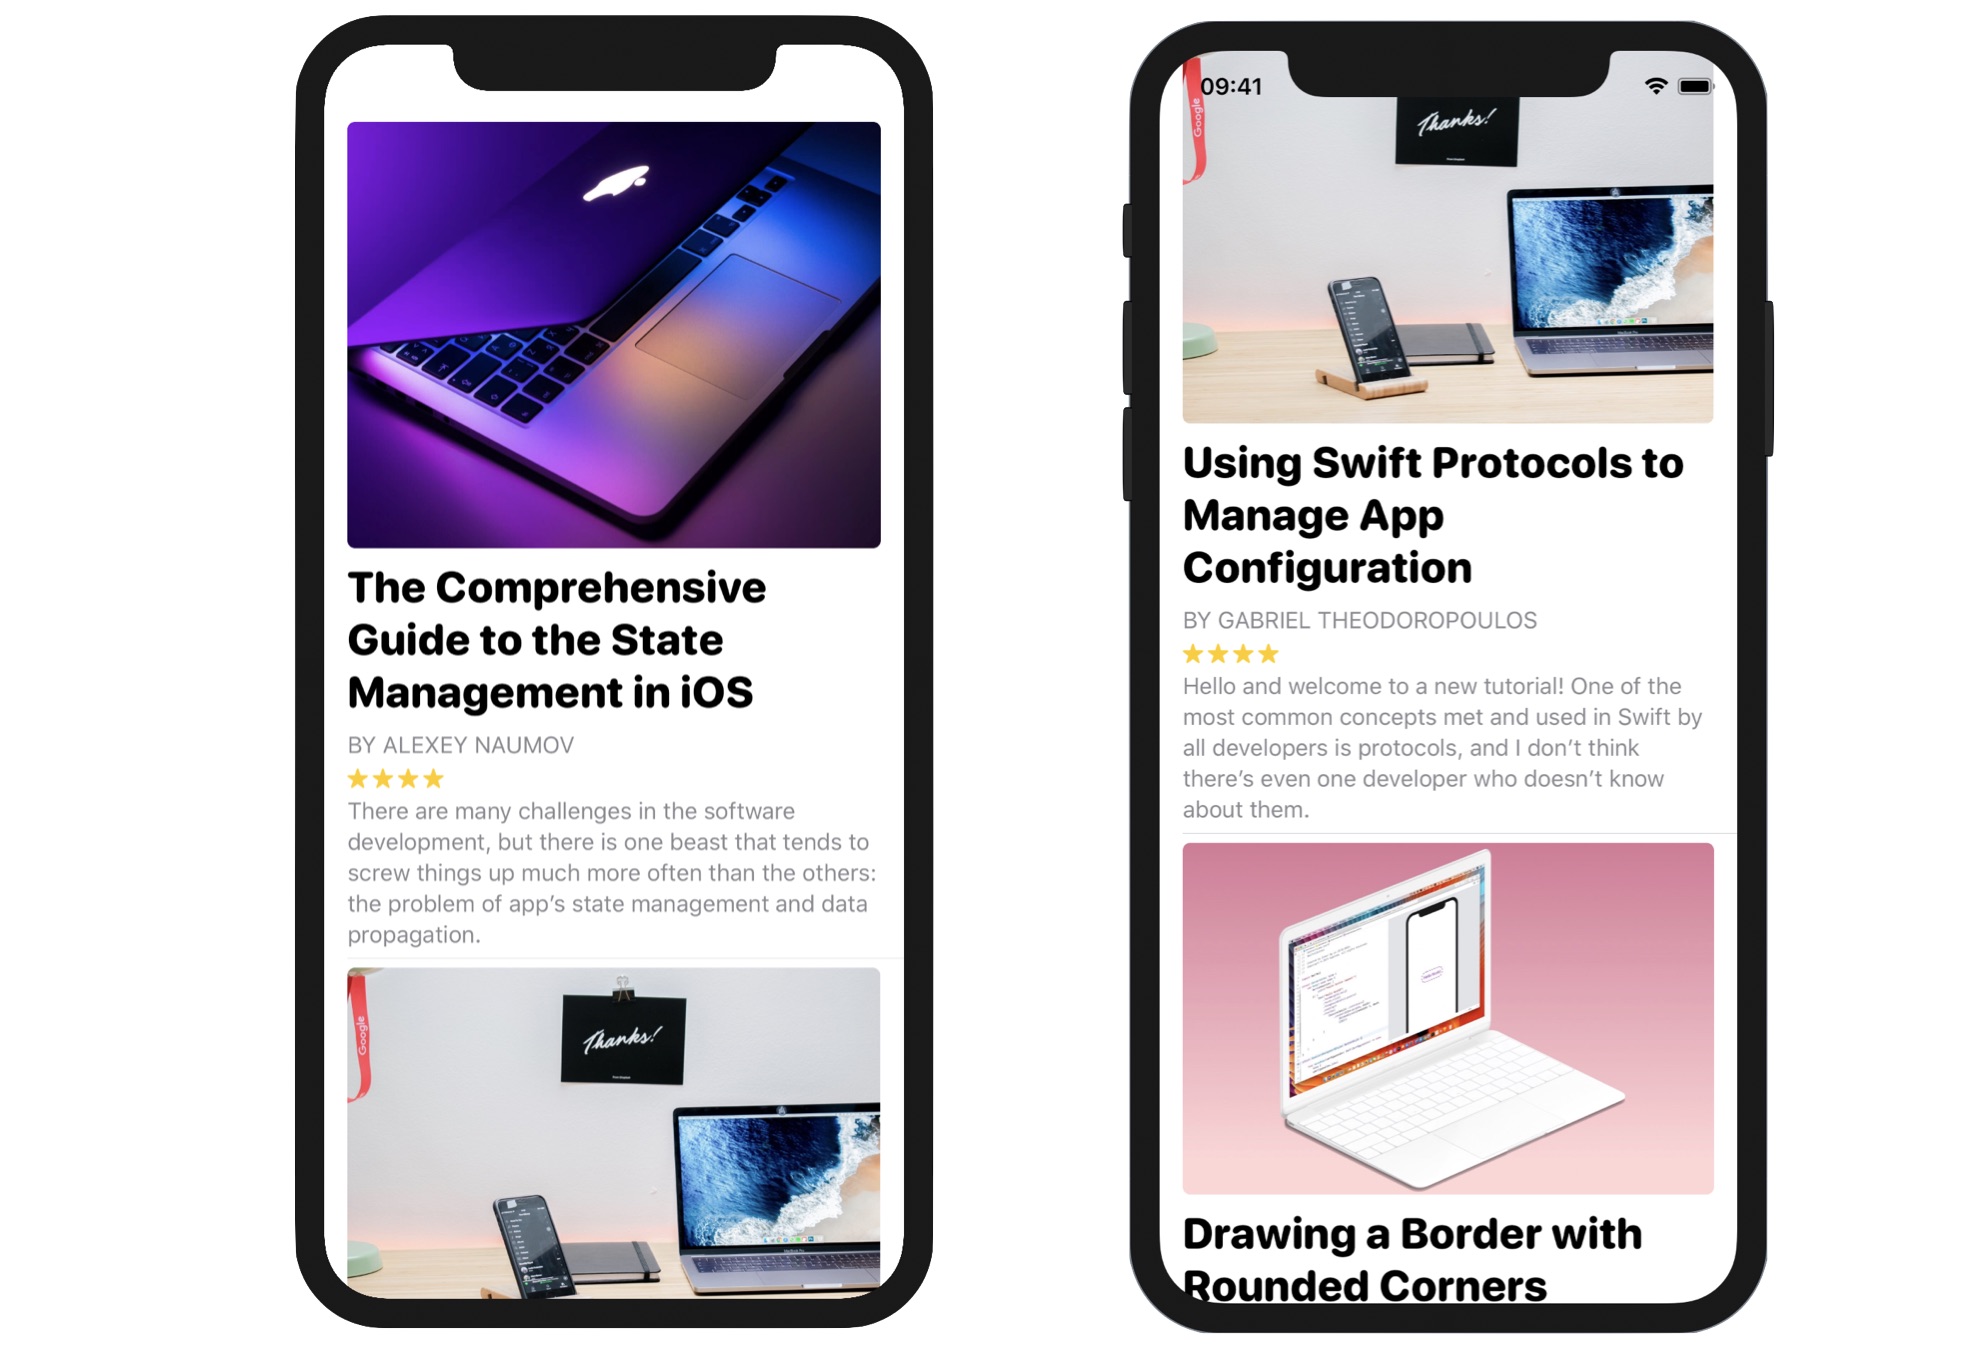
Before you move on to the next chapter, challenge yourself by building the list view shown in figure 13. It looks complicated but if you fully understand this chapter, you should be able to build the UI. Take some time to work on this exercise. I guarantee you'll learn a lot!
To save you time finding your own images, you can download the image pack for this exercise from https://www.appcoda.com/resources/swiftui/SwiftUIArticleImages.zip.
For reference, you can download the complete list project and solution to the exercise here:
- Demo project (https://www.appcoda.com/resources/swiftui4/SwiftUIList.zip)
- Solution to exercise (https://www.appcoda.com/resources/swiftui4/SwiftUIListExercise.zip)